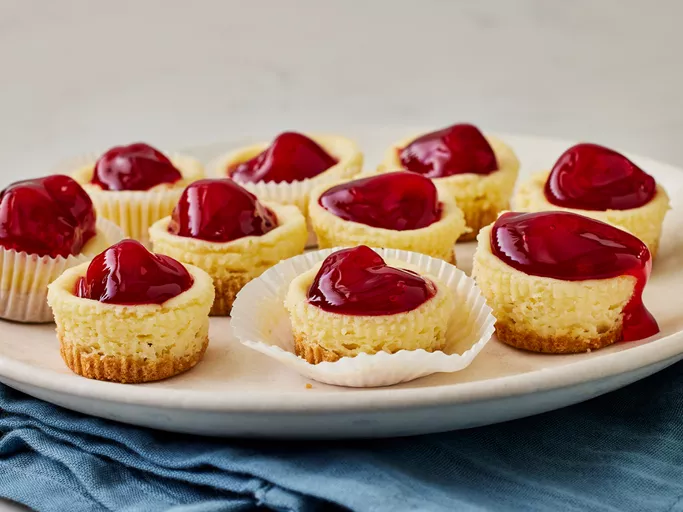
This mini cheesecake recipe is easy to make for holiday parties or any occasion! I like to top them with cherry pie filling, but they also taste great with any berries.
Nutrition Facts (per serving)
95
Calories
5g
Fat
12g
Carbs
1g
Protein
Ingredients
1x2x4x
Original recipe (1X) yields 48 servings
1 (12 ounce) package vanilla wafers
2 (8 ounce) packages cream cheese
¾ cup white sugar
2 large eggs
1 teaspoon vanilla extract
1 (21 ounce) can cherry pie filling
Directions
Gather all ingredients.Dotdash Meredith Food Studios
Preheat the oven to 350 degrees F (175 degrees C). Line two 24-cup miniature muffin tins with paper liners.
Crush vanilla wafers. Press 1/2 teaspoon of crushed vanilla wafers into each paper cup.Dotdash Meredith Food Studios
Beat cream cheese, sugar, eggs, and vanilla in a mixing bowl until light and fluffy. Fill each miniature muffin liner with this mixture, almost to the top.Dotdash Meredith Food Studios
Bake in the preheated oven for 15 minutes until the cheesecake is set. Cool. Top with a teaspoonful of cherry pie filling.Dotdash Meredith Food Studios
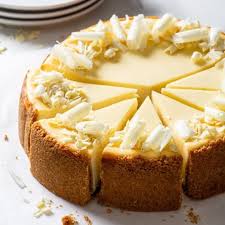
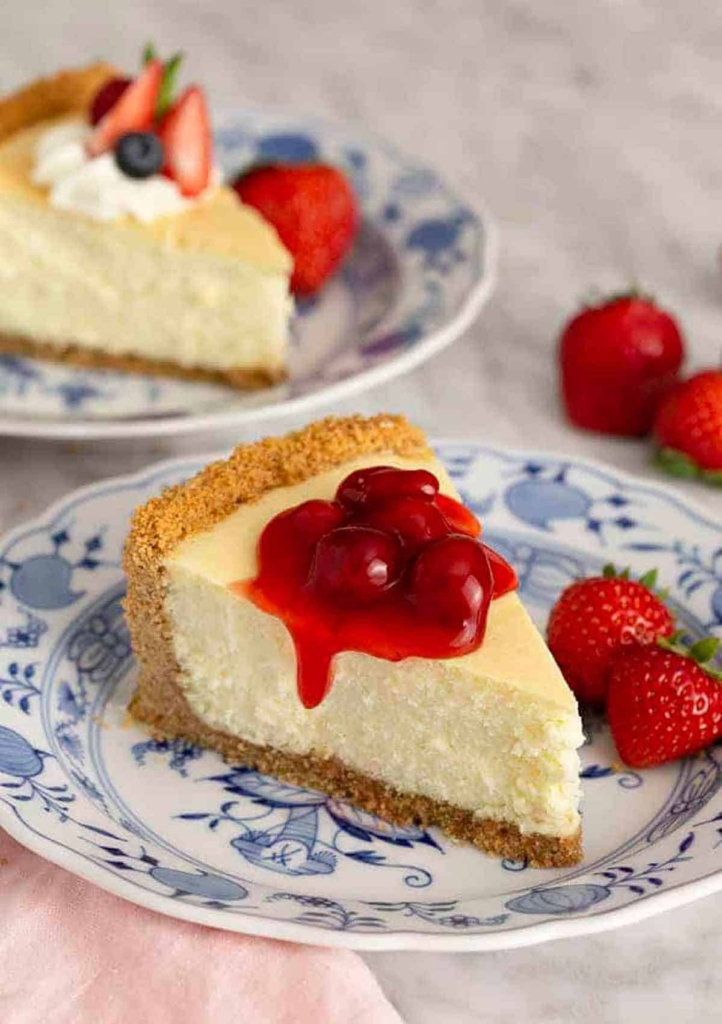
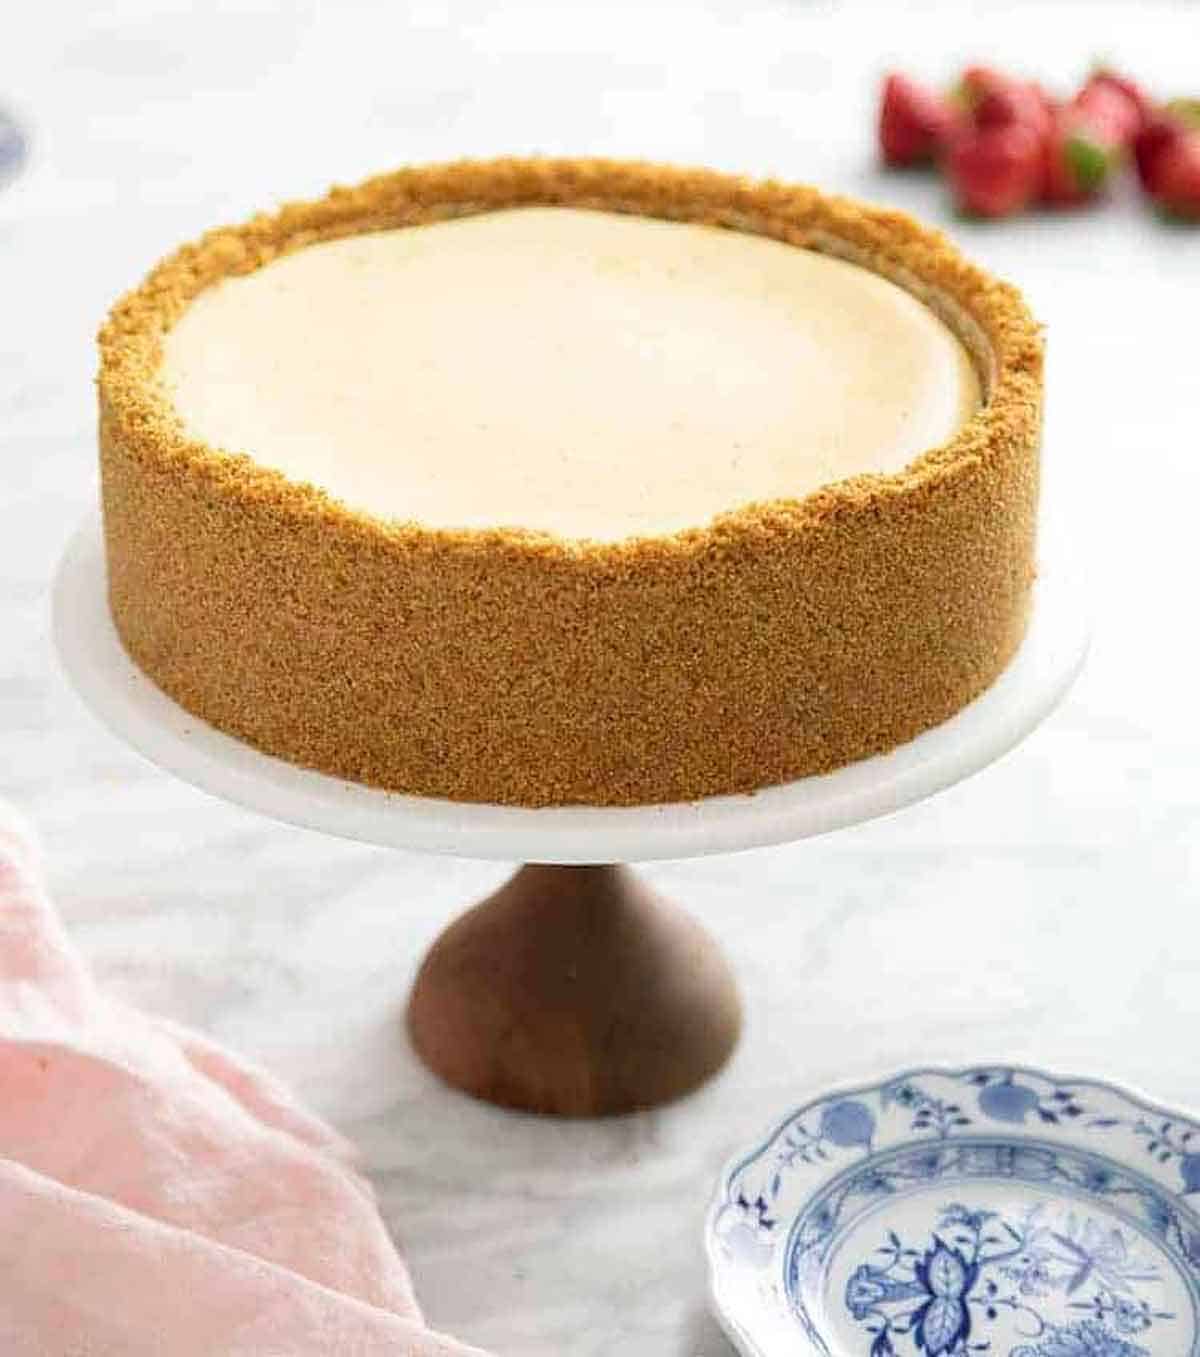
Creamy, smooth, and rich, this classic cheesecake recipe with a buttery graham cracker crust is simply decadent. My no-fuss recipe is a must-try— plus, there’s no water bath required for a crack-free cheesecake!
What You Need To Make This Recipe
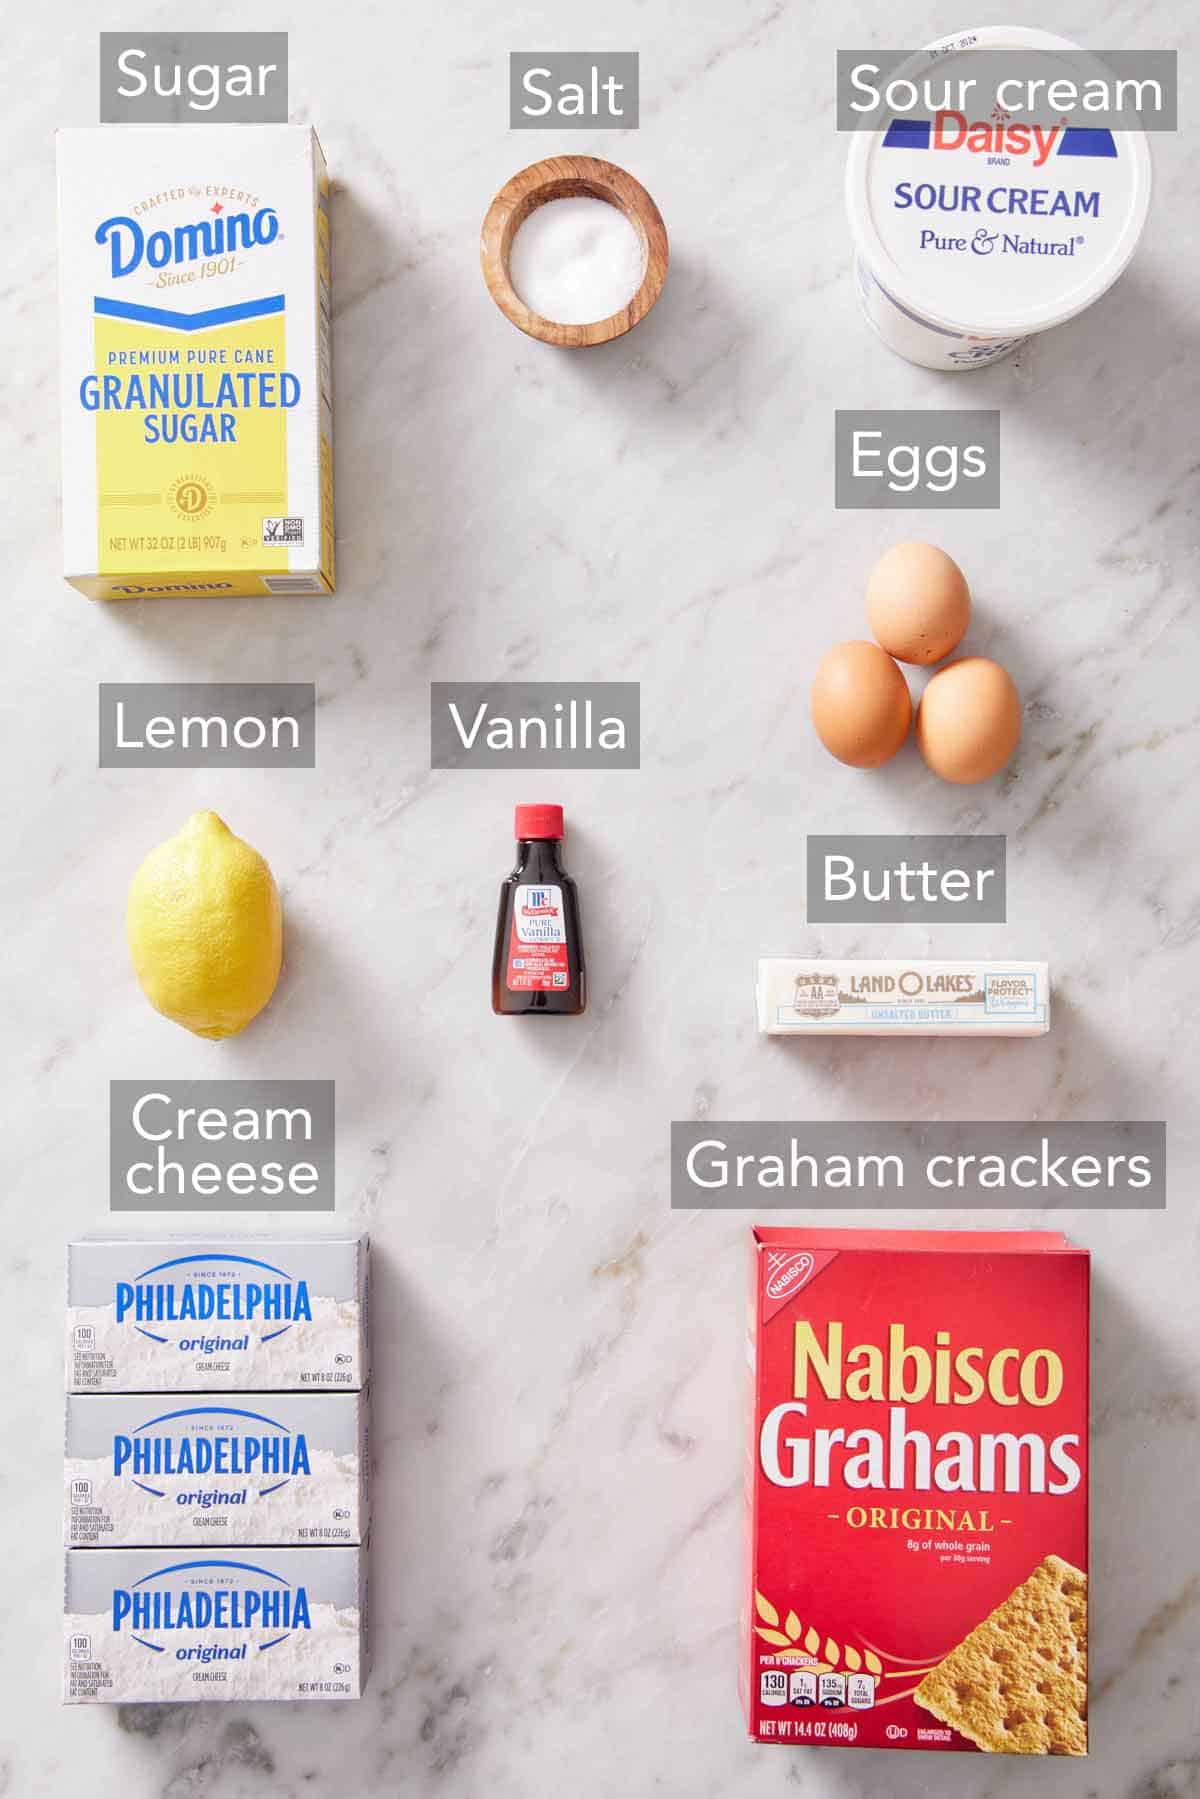
Graham cracker crust — for the buttery, crisp crust, you need graham cracker crumbs, melted butter, and sugar. You can buy premade crumbs in a box at the grocery store or blitz your own graham crackers in a food processor. Check out my graham cracker crust recipe for all the tips you need to know to make the perfect crust.
Cream cheese — blocks of plain, full-fat cream cheese is the best option. Low-fat cream cheese contains more water and can produce a cheesecake with an extra dense or grainy texture.
Granulated Sugar — you need 1 cup of white sugar to sweeten the cheesecake filling.
Vanilla — use high-quality vanilla extract, not vanilla essence. If you prefer a bakery-style look with little vanilla flecks in the batter, you can scrap the seeds from a vanilla bean or use vanilla bean paste.
Lemon juice — a little lemon juice cuts through the richness of the filling. This addition won’t taste like a lemon cheesecake, but it does enhance the flavor of the filling making it extra delicious!
Eggs — bring the eggs to room temperature before you start working on this recipe. If the eggs are cold, the cream cheese can firm back up when mixed with the eggs and form lumps in the batter.
Sour cream — use full-fat sour cream for the best results. Just like the eggs, let it come to room temperature for 30 minutes to 1 hour before you start the recipe.
What’s The Best Cream Cheese To Use?
For the best cheesecake ever, make sure you use the brick-style cream cheese, not the spreadable kind that comes in a carton. It should be plain and full-fat for the best flavor and perfect creamy texture. I prefer Philadelphia brand cream cheese. Other brands or generic store blocks can also work well, but the flavor and moisture content varies between each, so I always use Philadelphia to ensure consistent, delicious results.
Be sure to set it out for at least two hours before you start working on this recipe so the cream cheese has plenty of time to soften. This makes it easier to incorporate into a smooth, silky filling. Need to soften it faster? The warm bowl trick that I share for how to soften butter works really well here, too!
How To Make The Best Cheesecake
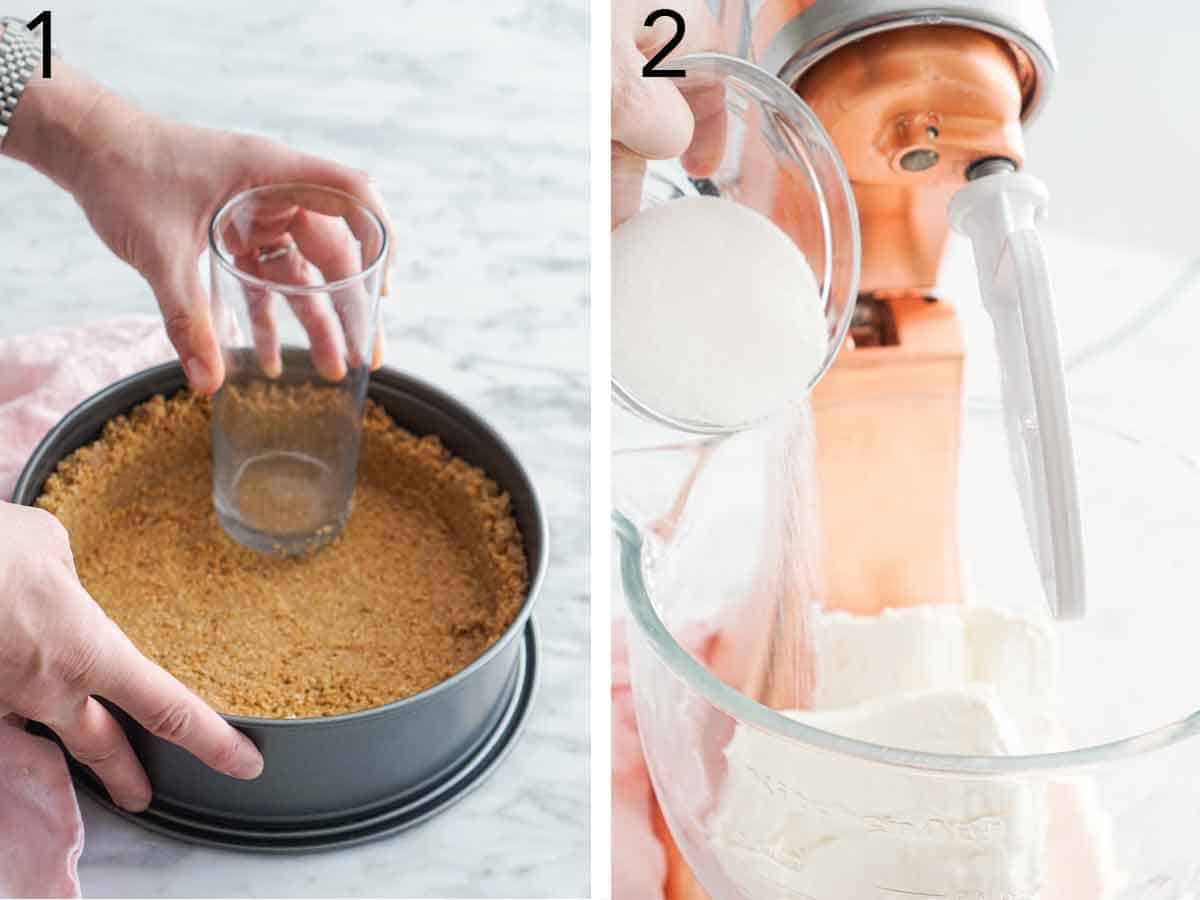
1. Make the buttery graham cracker crust in a medium bowl by combining the graham cracker crumbs, melted butter, and sugar. Stir together until the mixture feels like wet sand. Pour into a 9-inch springform pan. Press the crumbs into the bottom and slightly up the sides of the pan using the bottom of a glass or measuring cup. Place on a baking sheet and bake at 350°F for 10 minutes. Remove from the oven and let cool while making the cheesecake filling.
2. Place the cream cheese in a large bowl or the bowl of a stand mixer with the whip attachment. Beat on medium-low speed until creamy and smooth. Add the sugar, salt, vanilla extract, and lemon juice. Beat until the mixture is well combined and completely smooth. Stop and scrape down the sides of the bowl a few times during mixing to ensure everything is well incorporated.
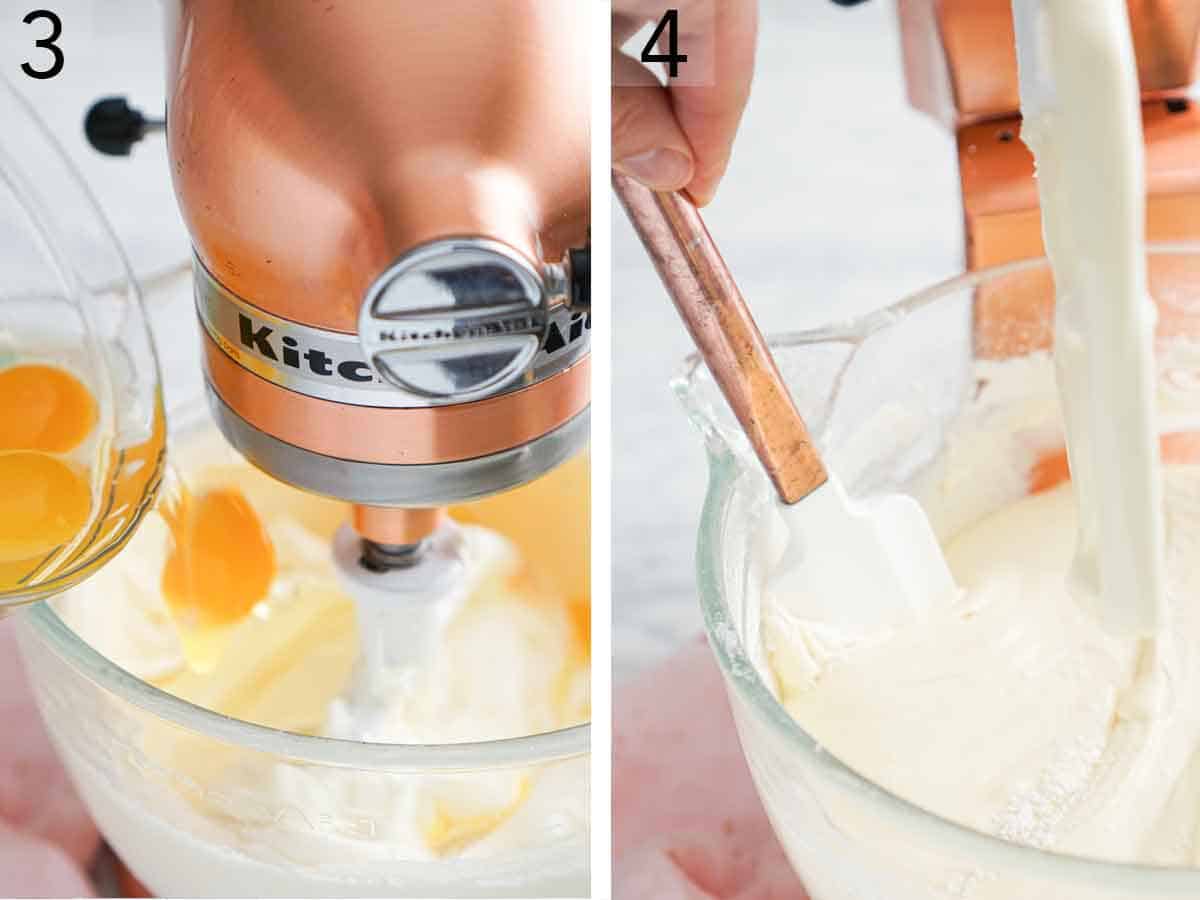
3. With the mixer on medium-low speed, add the eggs one at a time.
4. Stop and scrape down the bowl between additions.
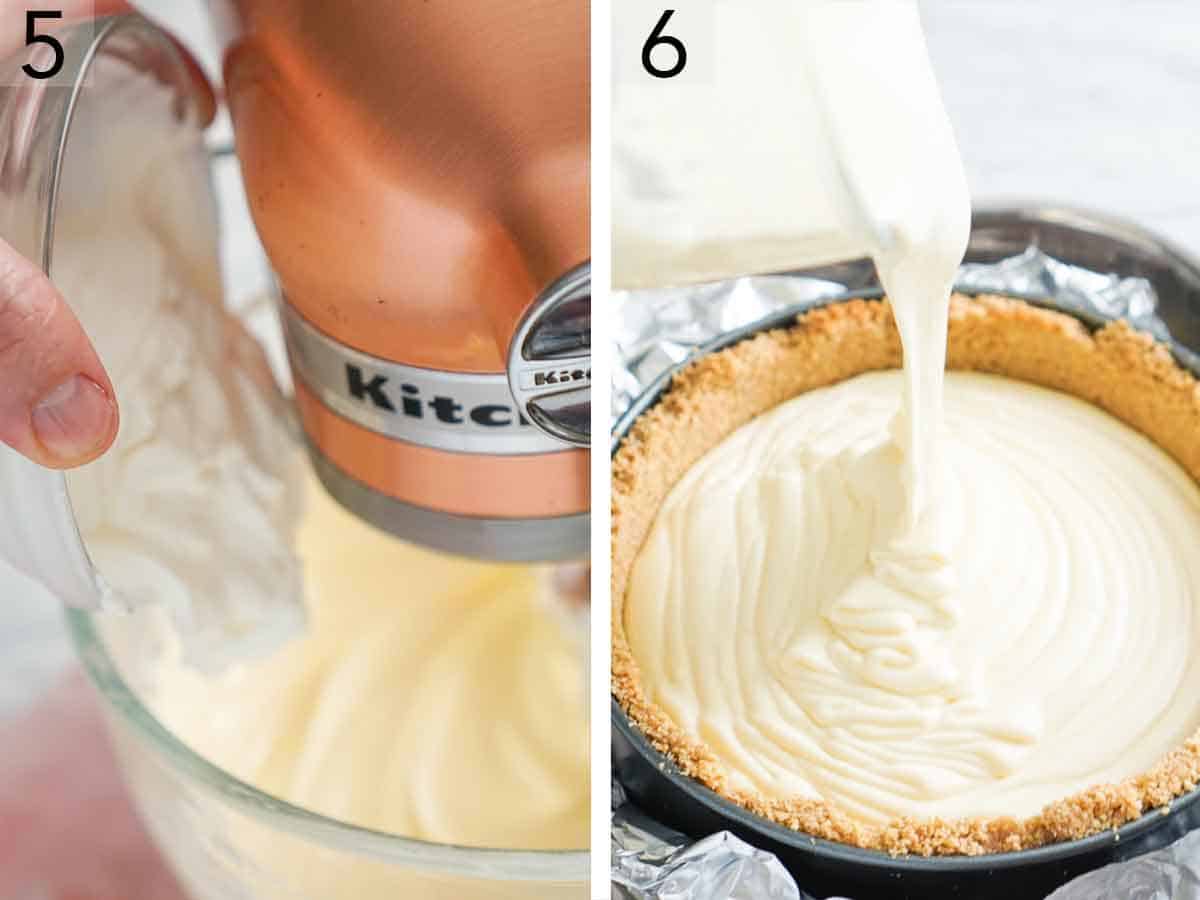
5. Once the eggs are well combined, mix in the sour cream until well incorporated.
6. Pour the batter into the cooled crust. Bake for 15 minutes, then reduce the oven temperature to 300°F and continue baking for another 30 to 35 minutes or until the edges of the filling are just slightly puffed and the center wobbles slightly when shaken gently. Turn off the oven and leave it in there with the door closed for 1 hour. Remove the cheesecake and let it cool at room temperature for another hour, then chill it in the refrigerator for at least 6 hours or up to 3 days before serving.
How To Prevent Your Cheesecake From Cracking
Follow these easy tips to bake up the perfect cheesecake:
Use room temperature ingredients. Make sure to bring your cold ingredients (eggs, sour cream, and cream cheese) to room temperature so they will easily incorporate without overmixing.
Don’t over-mix the batter. Over-mixing will incorporate too much air into the batter, leading to the cheesecake to puff up too much in the oven and then fall when it cools, giving you a cracked surface.
Don’t open the oven! Do not open the oven to peek once the oven has been turned off to let the cheesecake cool. The hot air from the oven will escape, and cold air will enter the oven, causing the cheesecake to fall or crack. Abrupt temperature changes are a big reason cheesecake fillings crack, so avoid them as much as possible.
Cool it slowly. Start by cooling the cheesecake in the oven and then at room temperature before eventually transferring it to the fridge to chill. The gradual cooling process prevents it from cracking.
Why You Don’t Need A Water Bath
Cheesecakes have a reputation for being fussy to bake, and one of the main reasons for this is the water bath. I specifically developed this recipe so that you can bake a cheesecake with a smooth, crack-free surface without a water bath! Here are my secrets to why you don’t have to use one for my recipe:
Using the right number of eggs. The correct ratio of eggs to cream cheese is vital for a smooth surface and a filling that is dense but still fluffy. Too many eggs will cause the filling to puff up too much, then collapse and crack when it cools. Too few, and the cheesecake will be too dense and crack when it cools. Generally, you want to use 1 large egg per 1 (8-ounce) block of cream cheese.
Baking slowly at a lower temperature. This allows the filling to set slowly, resulting in the ideal crack-free surface because the filling cooks more evenly. Although the filling will puff some, it doesn’t dramatically puff on the edges and overbake before the center is done.
Don’t trust your oven? If you’re concerned that your oven may run or cycle hotter than the intended bake temperature, you can put a casserole dish of hot water on the bottom oven rack with your cheesecake on the rack above it. This will add extra moisture to the oven without placing your pan in the water and risking water seeping into your cheesecake crust.
Why You Do Need A Springform Pan
A springform pan is a must for a baked cheesecake because it makes serving so easy. Since you can’t invert a cheesecake from a cake pan to remove it like you can, for example, a classic vanilla cake, a springform pan allows you to simply remove the sides of the pan and slide the cheesecake onto a serving dish.
In a pinch, you could bake this in a 10-inch pie dish and simply serve it out of the dish. The overall baking time might be 10 to 15 minutes less since the cheesecake will be a bit thinner.
Topping and Serving ideas
This cheesecake recipe is the perfect palette for your favorite toppings. Here are some of my favorites to serve over a cheesecake slice:
Fruit sauces like strawberry or raspberry sauce. Try my strawberry cheesecake for a chunky, glossy strawberry sauce topping.
How to Store
Make-ahead: Since cheesecake keeps well in the refrigerator for up to 4 days, feel free to make it a night or two in advance. This is actually the perfect way to ensure it has plenty of time to chill in the refrigerator. I like to keep it in the springform pan, lay a thin tea towel or paper towel on the top edge of the pan, and then wrap it with foil or plastic wrap. The towel will absorb any moisture and keep it from dripping onto the cheesecake filling. Remove it from the pan when you are ready to serve.
Leftovers: Store the cheesecake in an airtight container and refrigerate for up to 4 days.
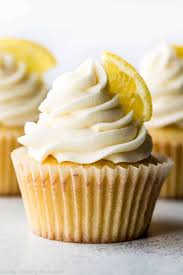
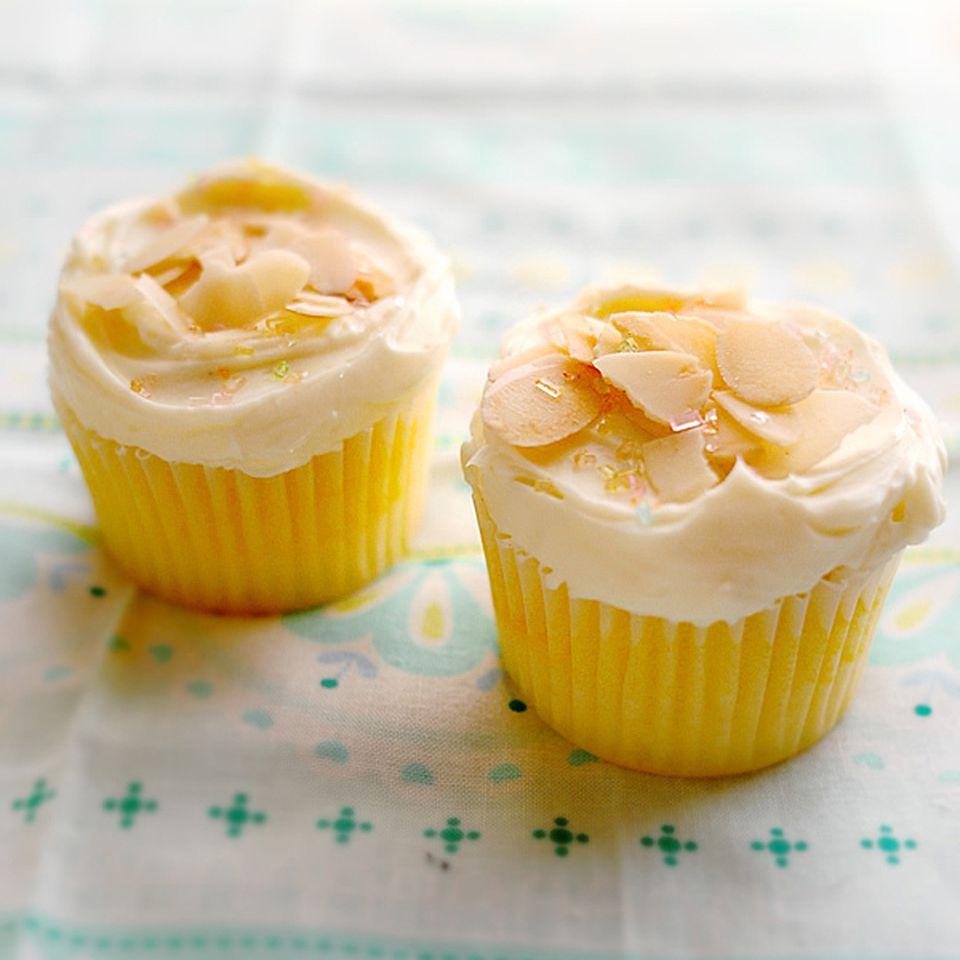
Here is a lemon cupcake recipe I use for beautifully delicious treats. Ideally, you’d use buttercream frosting to top the cupcakes, but I tried these with lemon cream icing for a less buttery option, and they were perfect! These cupcakes are truly lighter than air and will melt in your mouth.
Nutrition Facts (per serving)
232
Calories
13g
Fat
27g
Carbs
3g
Protein
Ingredients
1x2x4x
Original recipe (1X) yields 30 servings
Cupcakes:
3 cups self-rising flour
½ teaspoon salt
1 cup unsalted butter, at room temperature
2 cups white sugar
4 large eggs, at room temperature
2 tablespoons lemon zest
1 teaspoon vanilla extract
1 cup whole milk, divided
2 ½ tablespoons fresh lemon juice, divided
Lemon Cream Icing:
2 cups chilled heavy cream
¾ cup confectioners’ sugar
1 ½ tablespoons fresh lemon juice
Directions
Gather the ingredients. Preheat the oven to 375 degrees F (190 degrees C). Line 30 cupcake pan cups with paper liners.
Prepare the cupcakes: Sift flour and salt together in a bowl. Beat butter and sugar together in another bowl with an electric mixer until light and fluffy. Add in eggs one at a time, beating after each addition to incorporate. Mix in lemon zest and vanilla.
Gently beat flour mixture into butter mixture, 1/3 at a time, alternating with 1/2 of the milk and 1/2 of the lemon juice after each of the first two additions of flour. Beat until just combined; do not overmix.
Fill the prepared cupcake liners with batter, 3/4 full, and bake in the preheated oven until a toothpick inserted in the center comes out clean, about 17 minutes. Let the cupcakes cool in the pans before removing them to finish cooling on a rack, about 10 minutes.
Meanwhile, make the icing: Beat cream in a chilled bowl with an electric mixer set on low until cream begins to thicken. Add confectioners’ sugar and lemon juice, a little at a time, beating after each addition, until fully incorporated. Increase the mixer speed to high and beat until the icing forms soft peaks, about 5 minutes.
Spread icing on cooled cupcakes. Refrigerate leftovers.
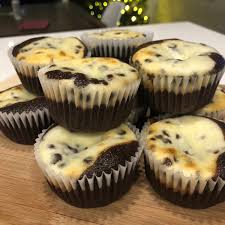
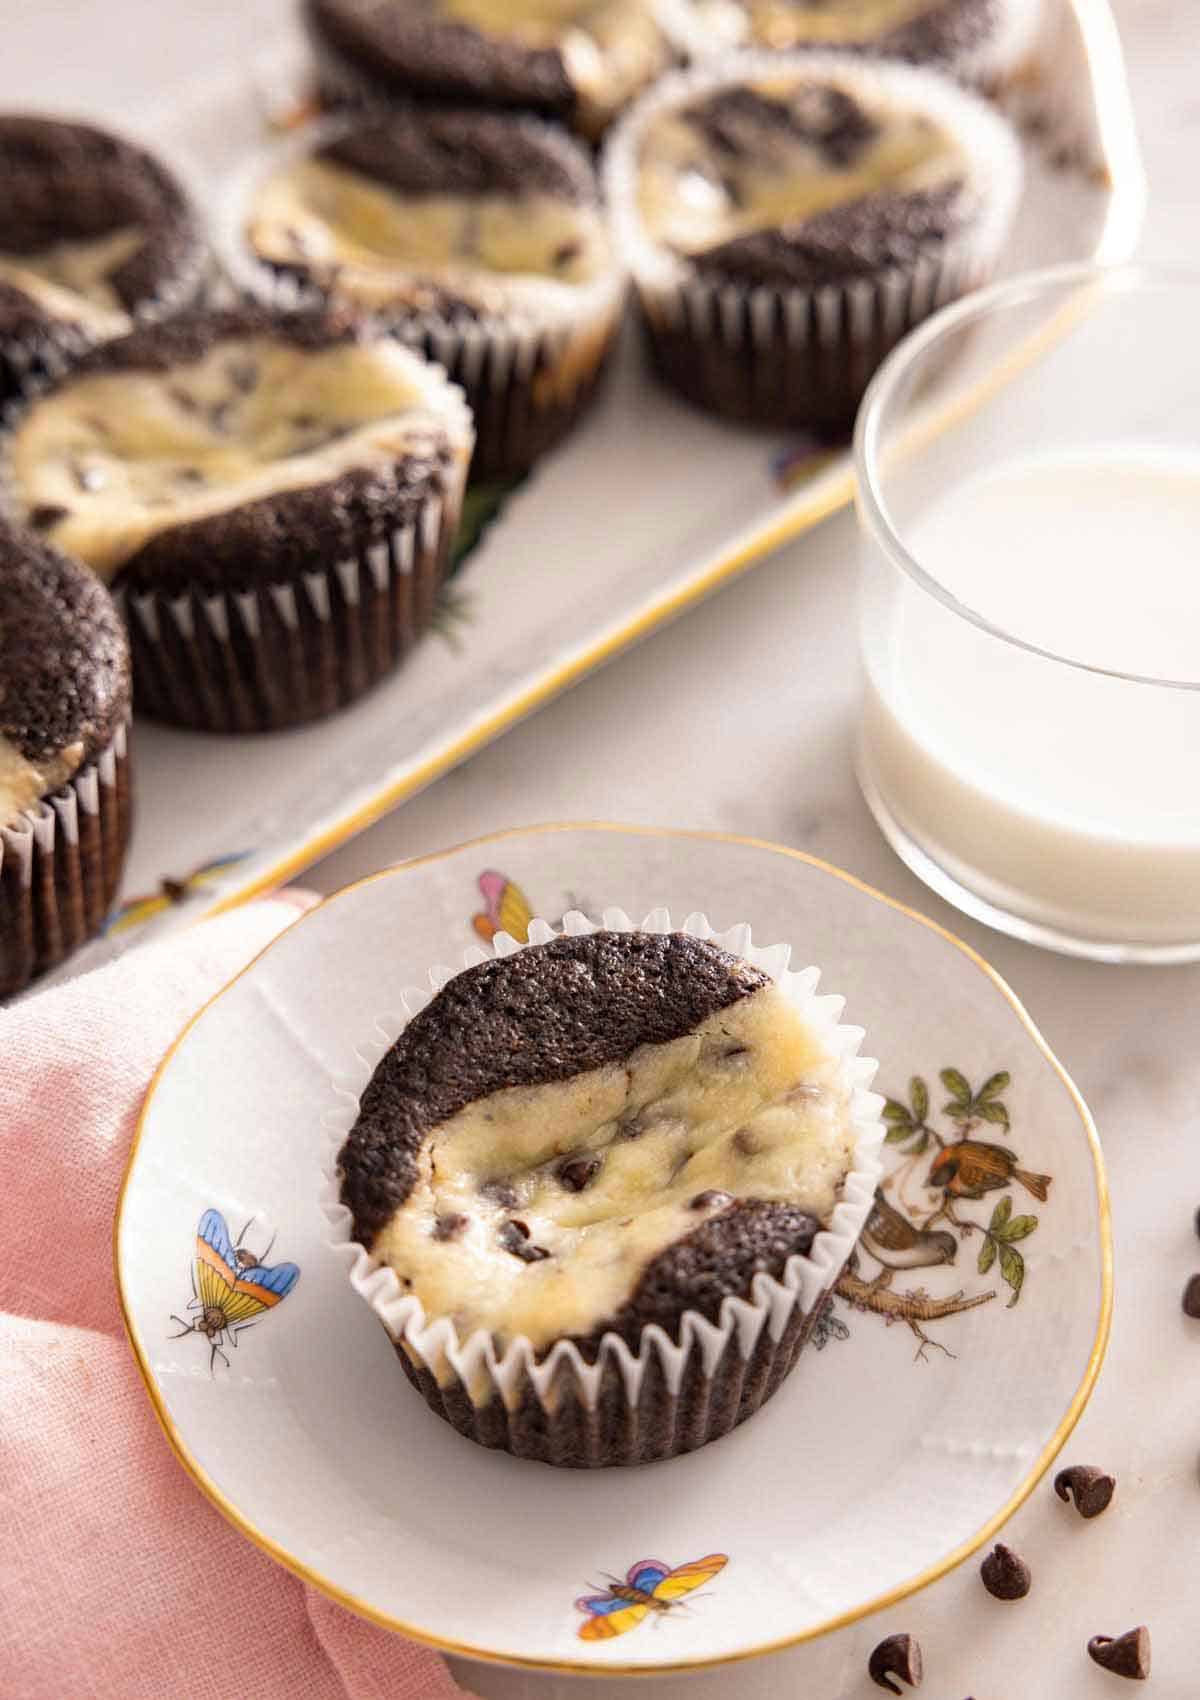
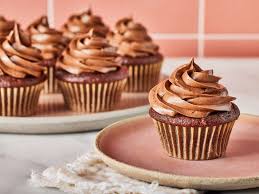
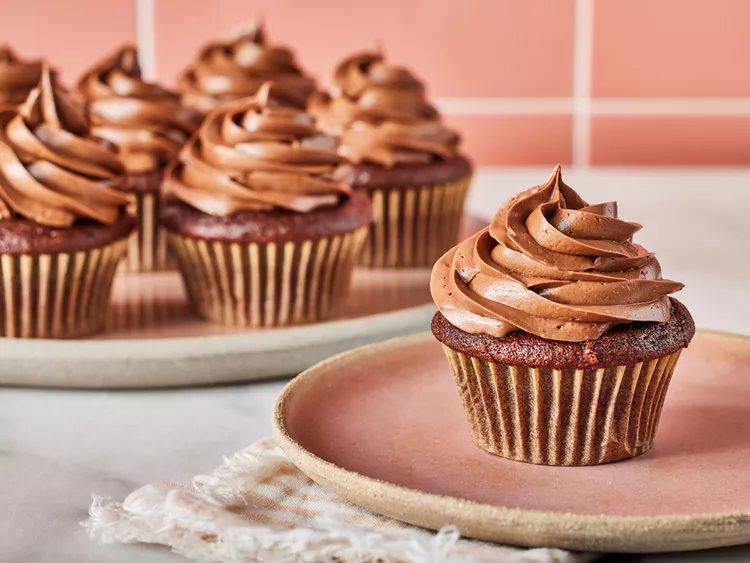
These Black Bottom Cupcakes are such delightful treats that are very easy to make. The cupcakes have a fudgy chocolate base and a creamy chocolate chip cheesecake topping that are always a hit at parties. Moist and tender, these cupcakes will melt in your mouth.
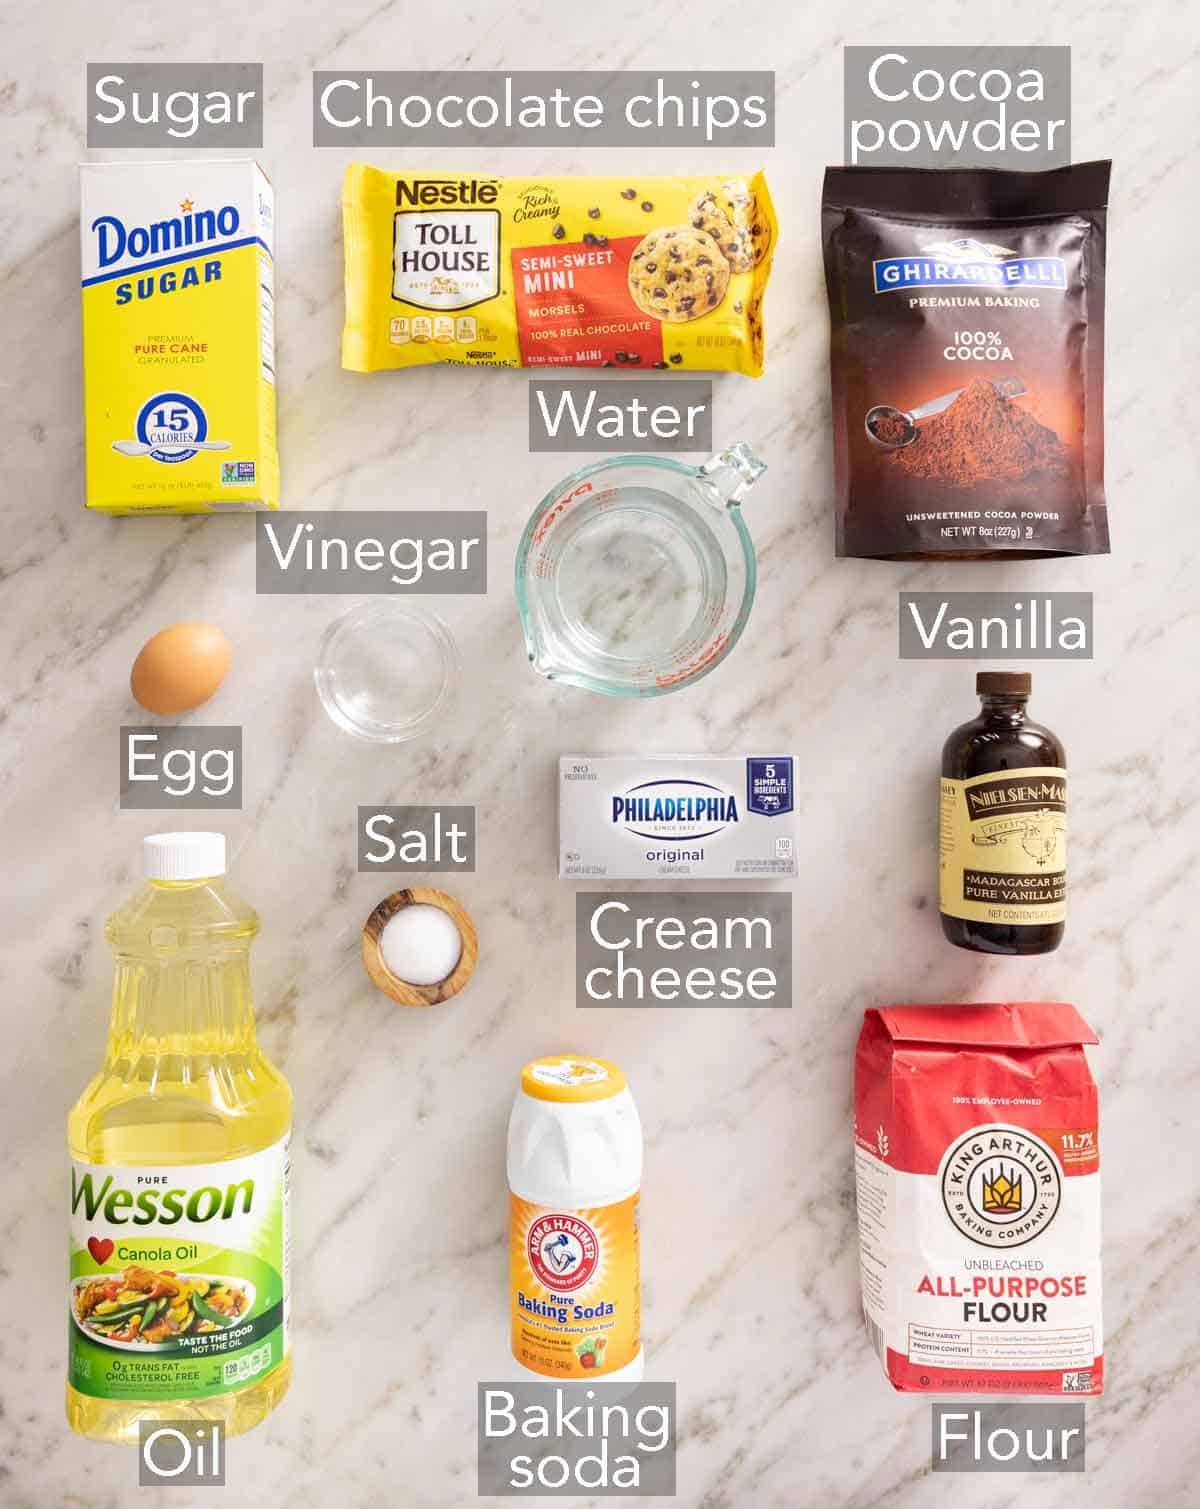
What You Need to Make This Recipe
Cream cheese — be sure to use full-fat cream cheese and not the spreadable type from a tub. Cold cream cheese won’t mix well, so bring it to room temperature, or it’ll leave small lumps in the filling.
Chocolate chips — you can use regular chocolate chips or mini chocolate chips. I prefer mini chocolate chips so each bite is filled with chocolate chips. You can also use any chips in this recipe, such as dark chocolate, white, milk chocolate, or semi-sweet.
Cocoa powder — I use unsweetened cocoa powder for this recipe and not Dutch-process cocoa powder. Dutch-process cocoa powder has been neutralized in an alkaline solution which means it won’t react with the baking soda to give the cupcakes a good rise.
Vinegar — when you combine white vinegar and baking soda in the batter, it releases carbon dioxide and causes the cupcake batter to rise, making for a moist, fluffy texture. If you skip the vinegar, you may end up with a dense cupcake.
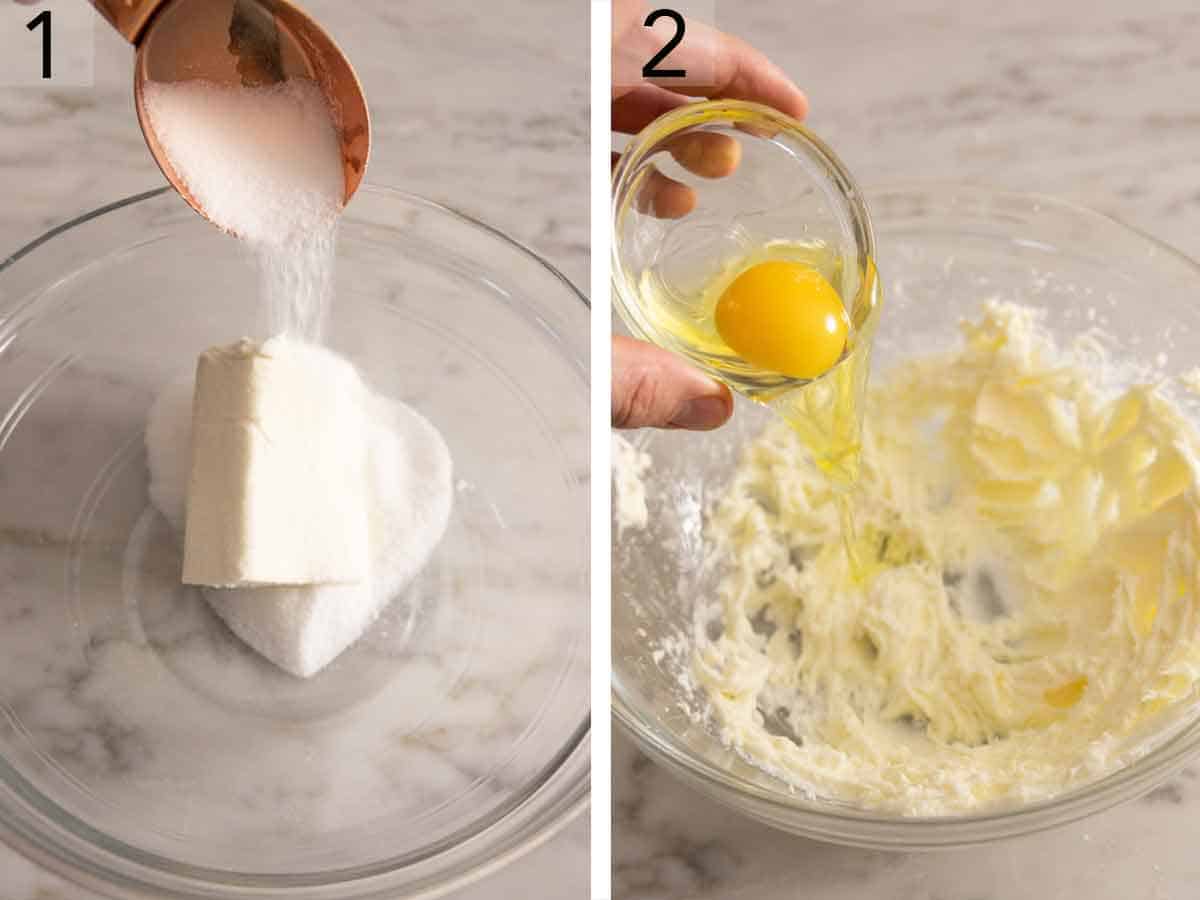
How to Make Black Bottom Cupcakes
1. In a medium bowl, beat the cream cheese and sugar with a mixer on medium speed until smooth.
2. Add the egg and salt. Beat until well combined.
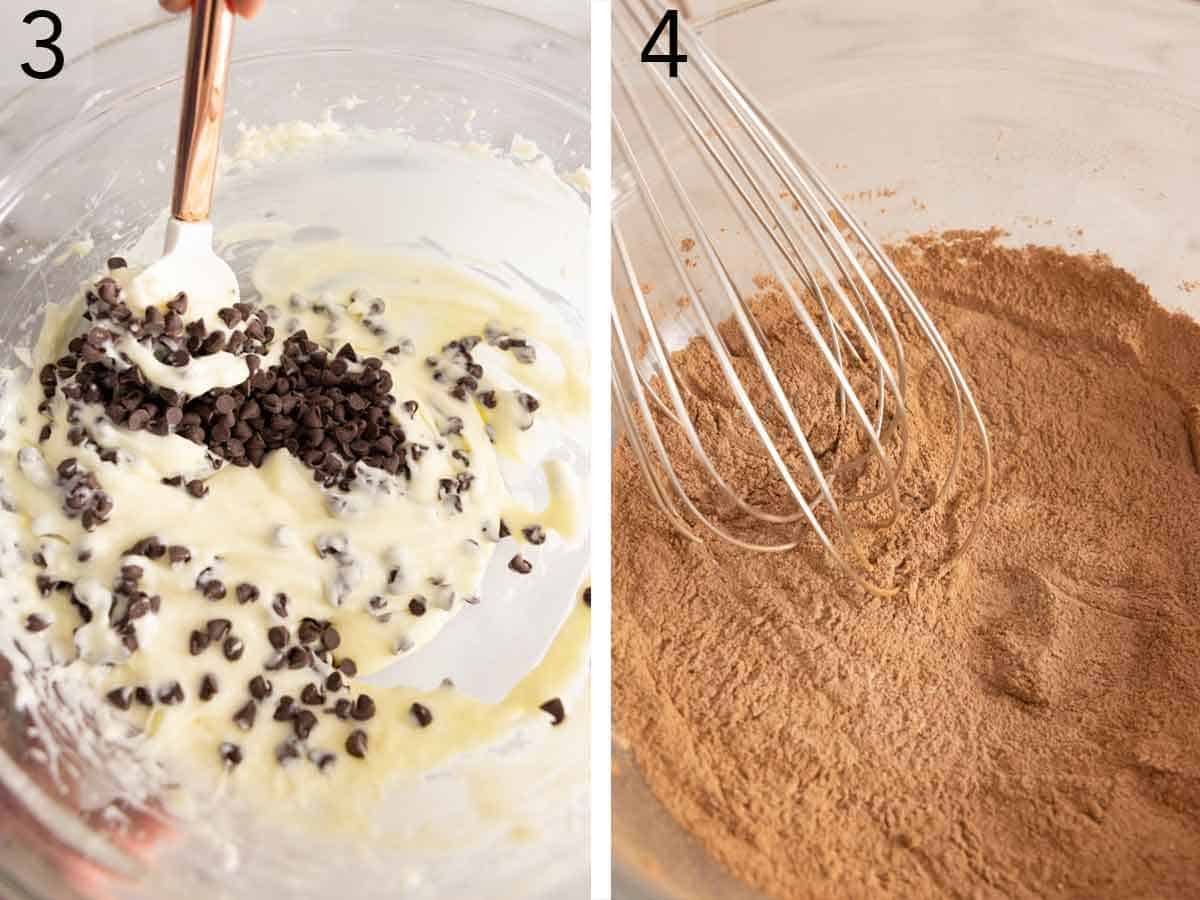
3. Stir in chocolate chips.
4. Whisk together the flour, sugar, cocoa, baking soda, and salt in a large bowl.
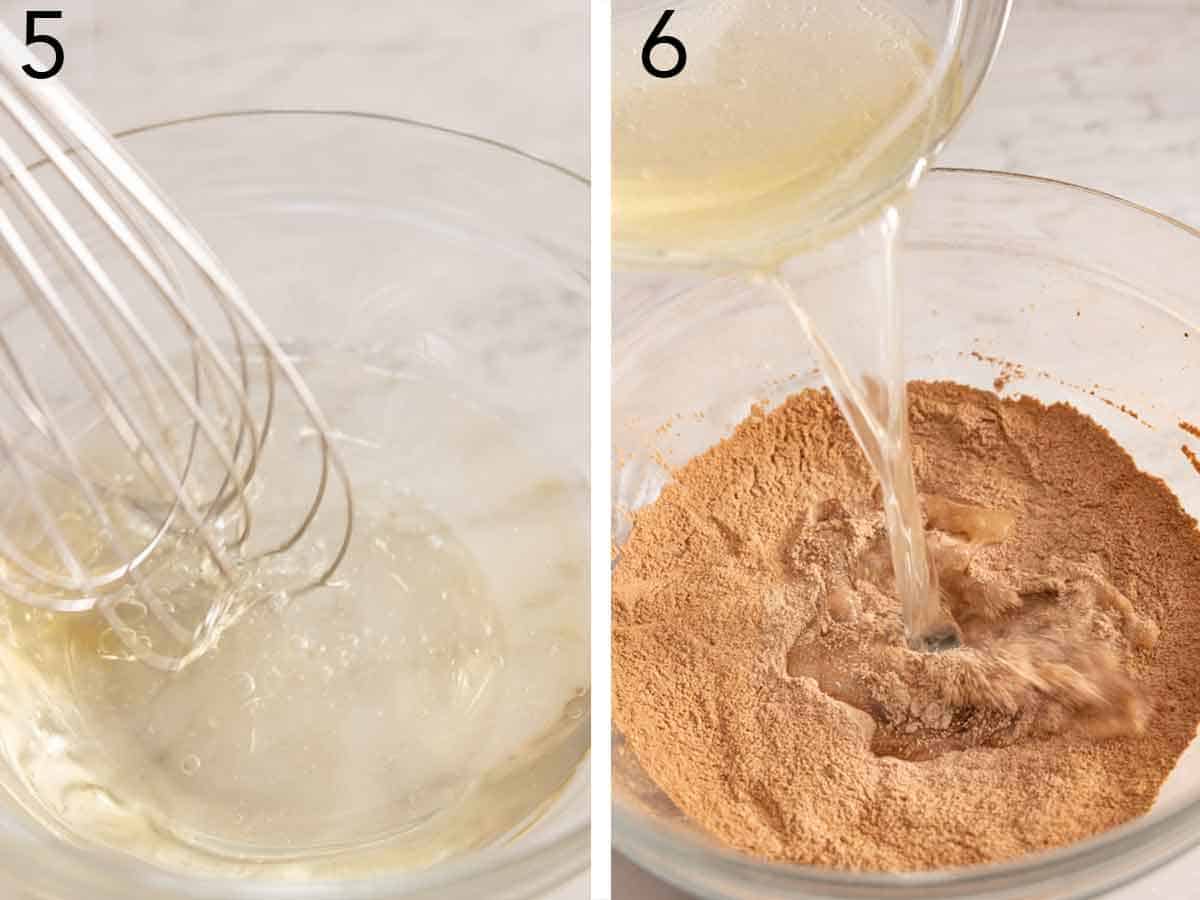
5. Whisk together the water, oil, vinegar, and vanilla in a small bowl.
6. Add the water mixture to the flour mixture, stirring until well combined and smooth.
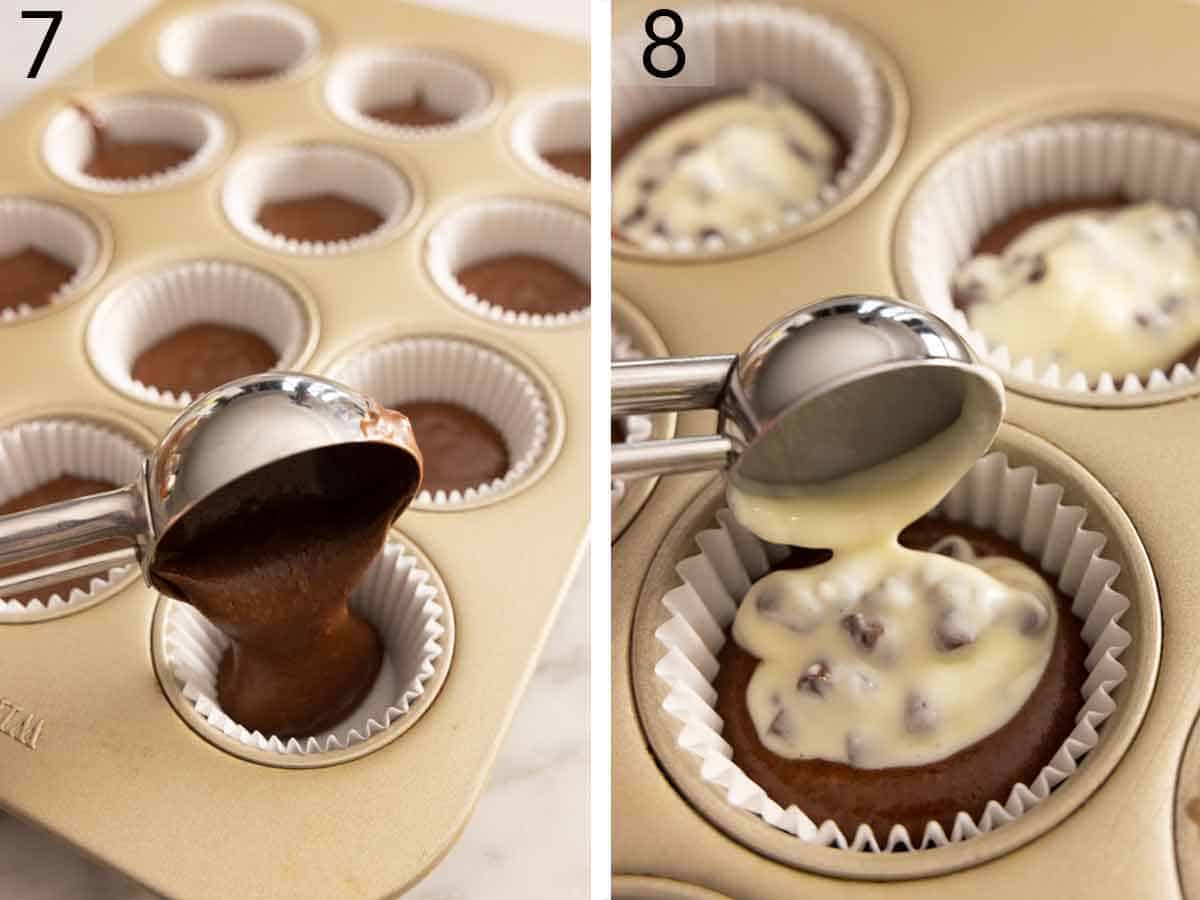
7. Divide the chocolate batter evenly among the paper liners in a muffin pan.
8. Spoon the cream cheese mixture into the center of the chocolate batter in each liner. Bake for 16 to 18 minutes or until a wooden pick inserted into the chocolate cake comes out clean, and the cream cheese filling is set. Let the black bottom cupcakes cool in the pan for 5 minutes before removing them from the pan and cool completely on a wire rack.
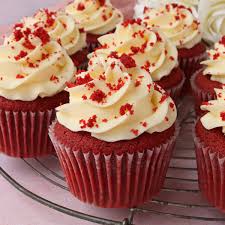
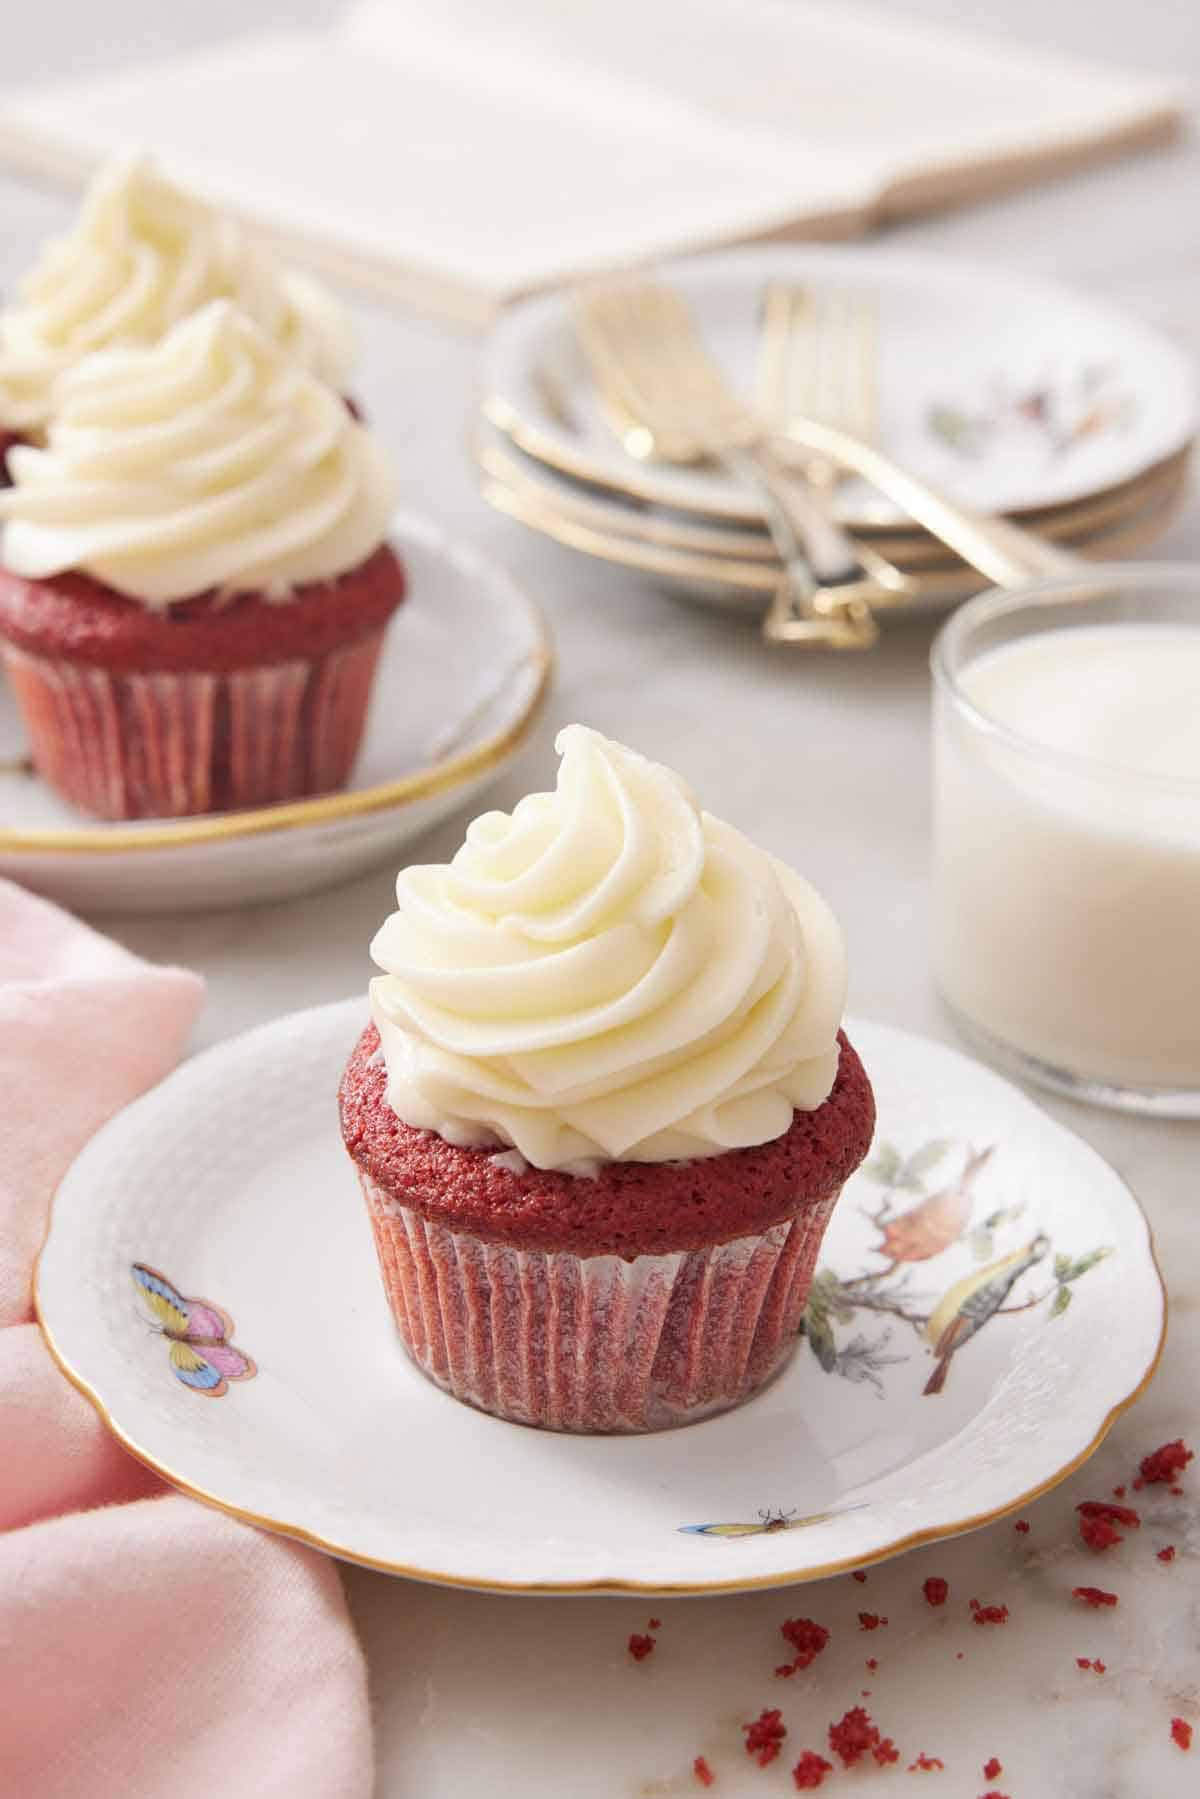
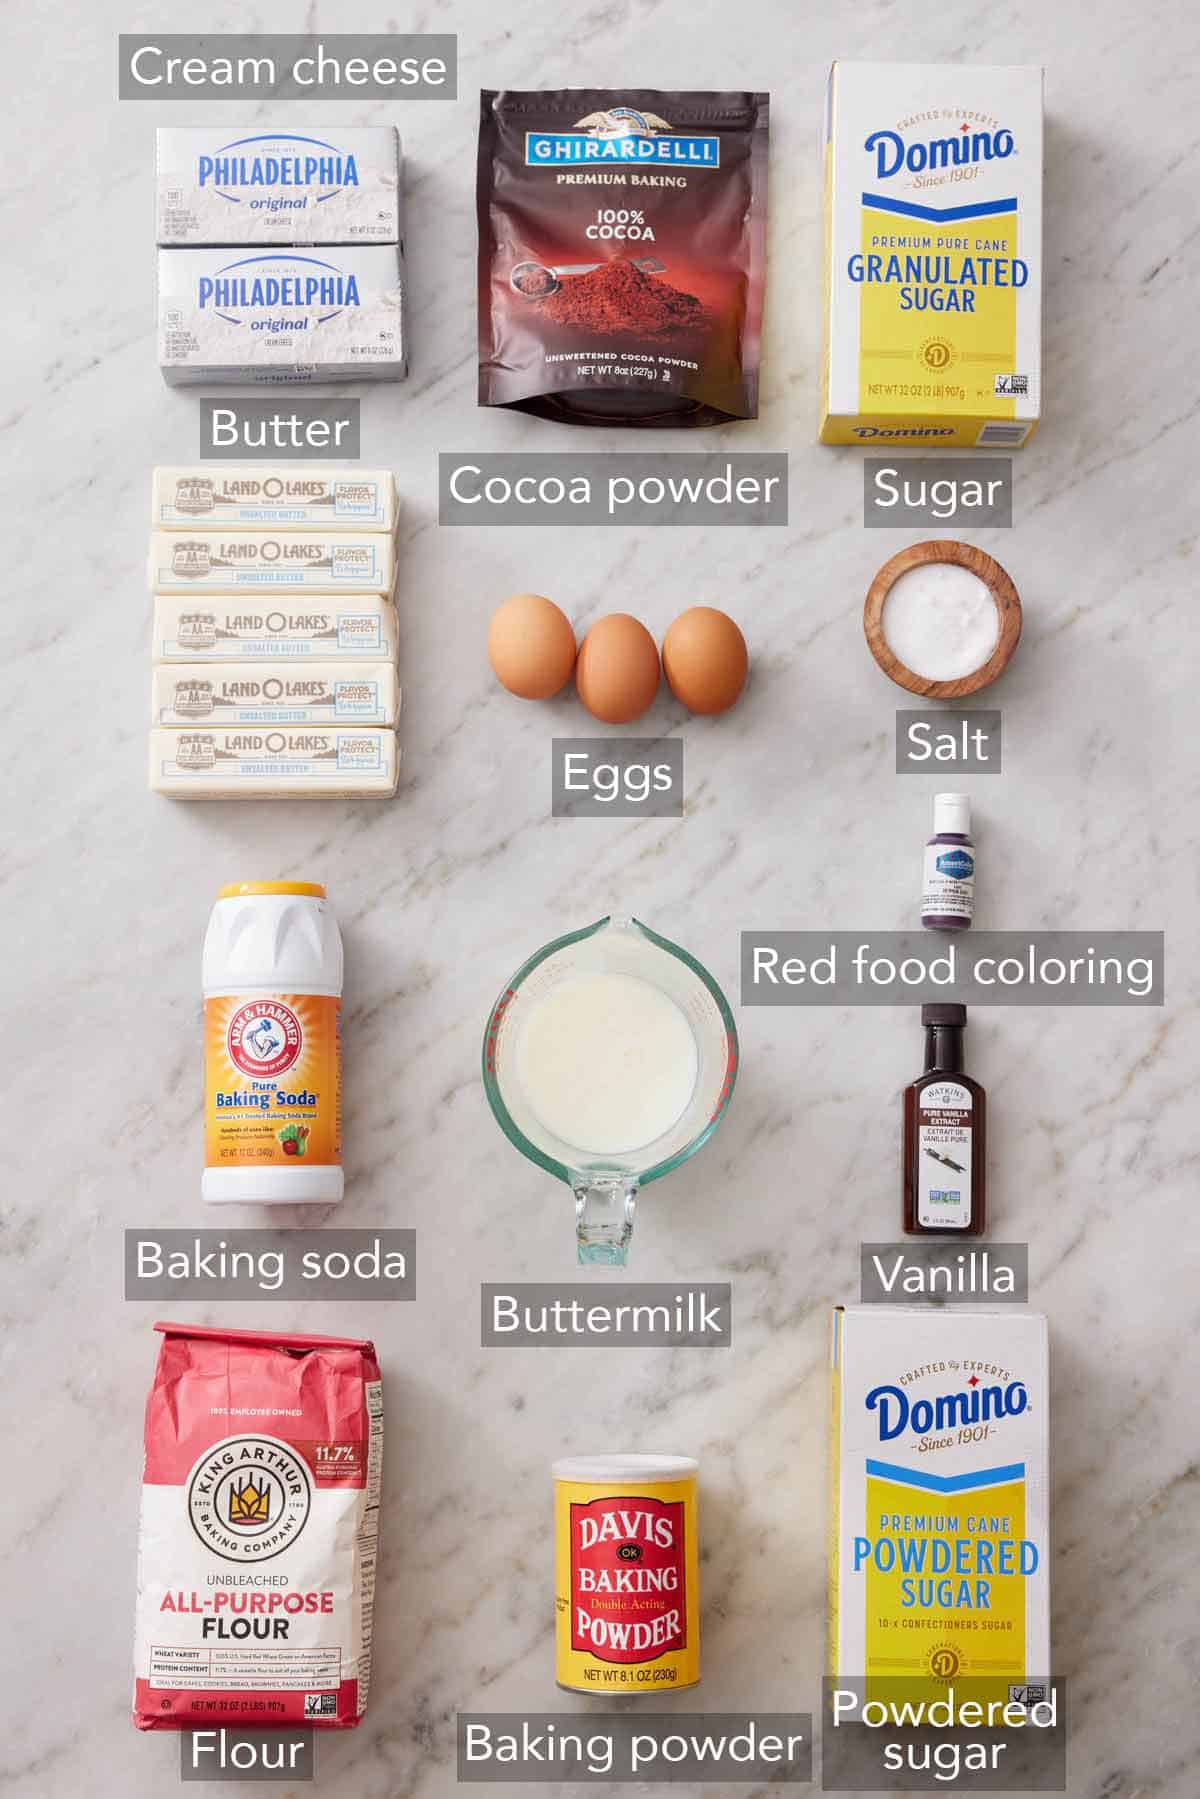
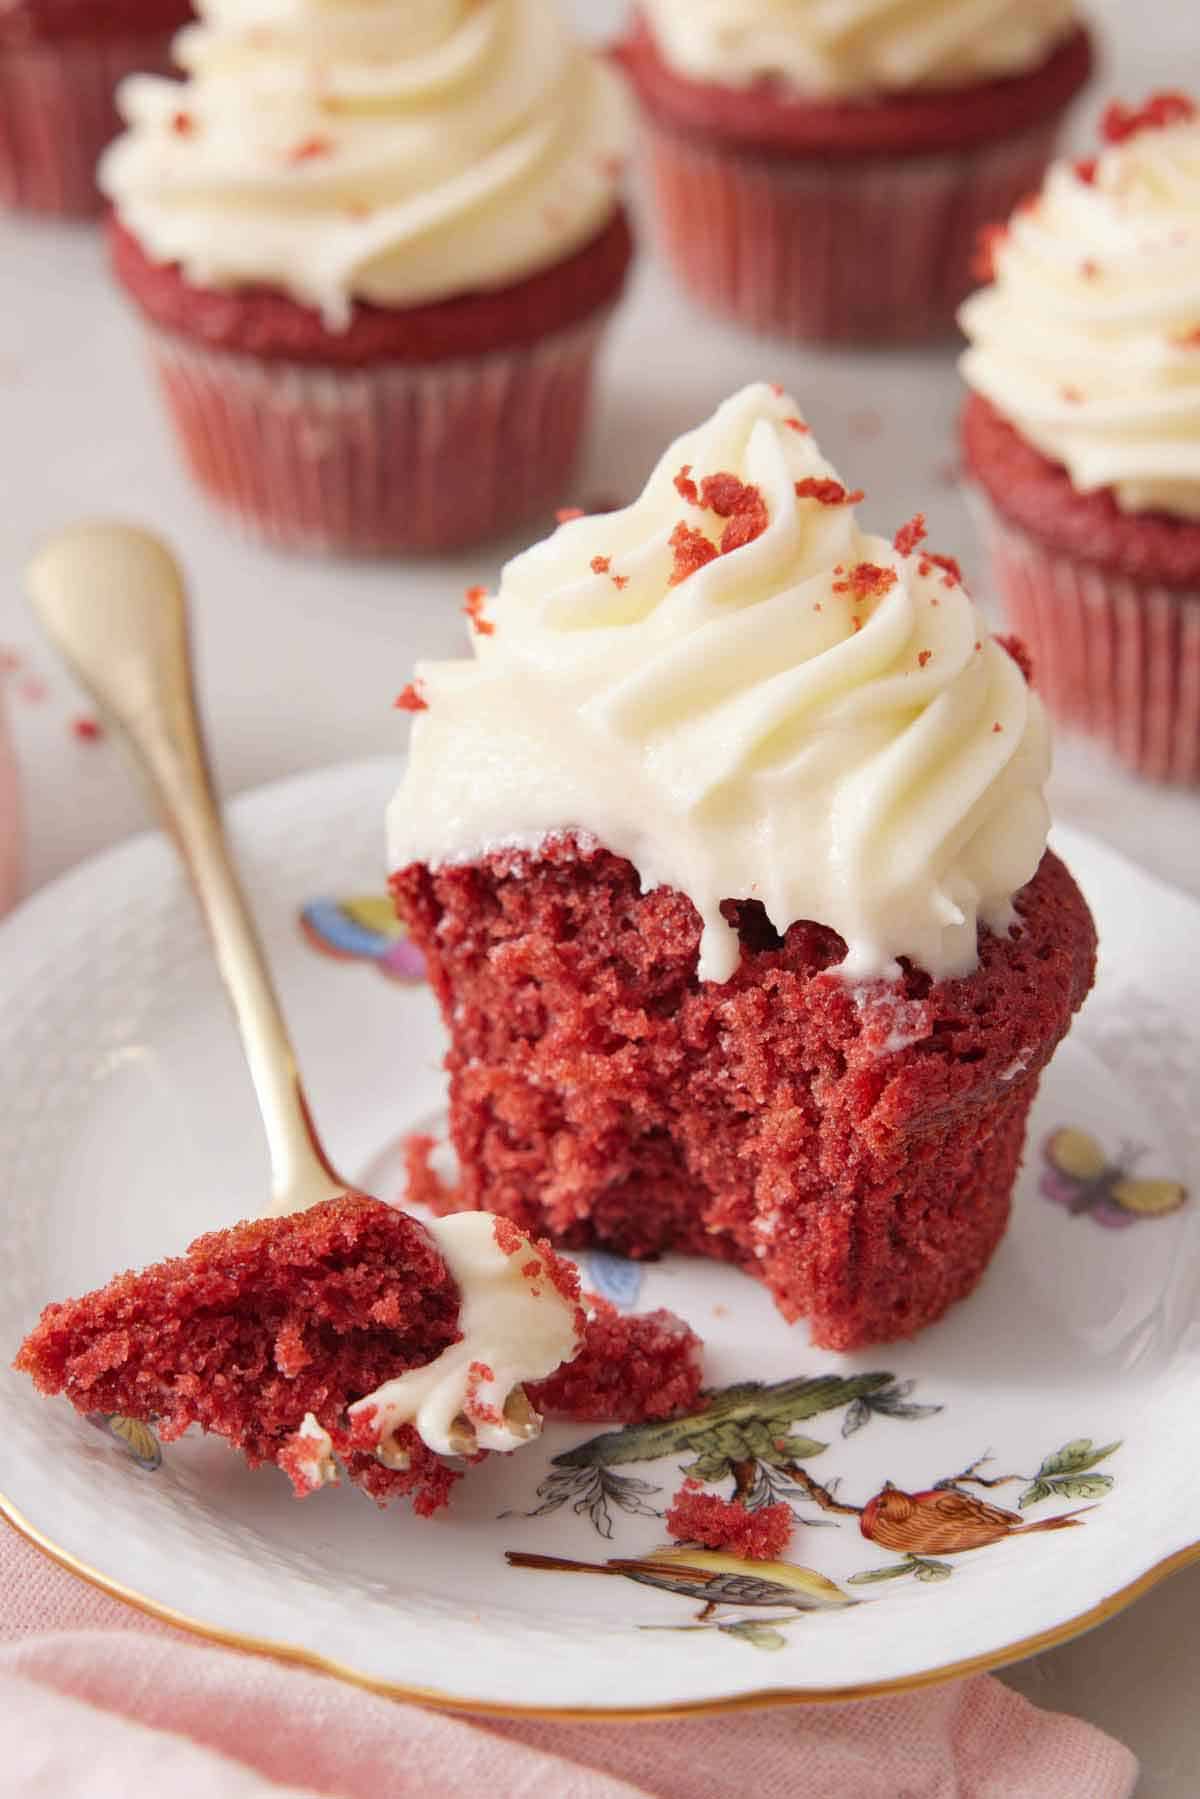
Vibrant and festive red velvet cupcakes combine moist cake with classic cream cheese frosting for a stunning individually-sized dessert. Easy to make and fun to decorate with a swirl of frosting and cake crumbles!
What You Need to Make This Recipe
All-Purpose Flour – weigh your flour using a food scale for the most accurate measurement. For the best fluffy and light cupcakes, don’t forget to sift all dry ingredients.
Cocoa Powder – a high-quality cocoa powder offers the most flavor. Increase or decrease the amount of cocoa powder to personalize how chocolatey you want your cupcakes.
Butter – allow the unsalted butter for both the cupcakes and the cream cheese frosting to come to room temperature before using. Room-temperature butter will blend smoothly and make for more fluffy cupcakes and frosting.
Vanilla Extract – balances the chocolate flavor and adds to this recipe’s signature flavor. Substitute vanilla bean paste if you prefer.
Buttermilk – buttermilk is a staple ingredient in red velvet cake and helps give the cupcakes their signature flavor and texture because the buttermilk reacts with both the baking soda and baking powder. If you don’t have buttermilk, you can make your own sour milk with 1 cup whole milk and 1 tablespoon of lemon juice or white vinegar.
Cream Cheese – full-fat cream cheese makes the richest cream cheese frosting. You can use reduced-fat cream cheese if you prefer, but be sure to use block-style cream cheese, not whipped or spreadable cream cheese.
How to Make Red Velvet Cupcakes
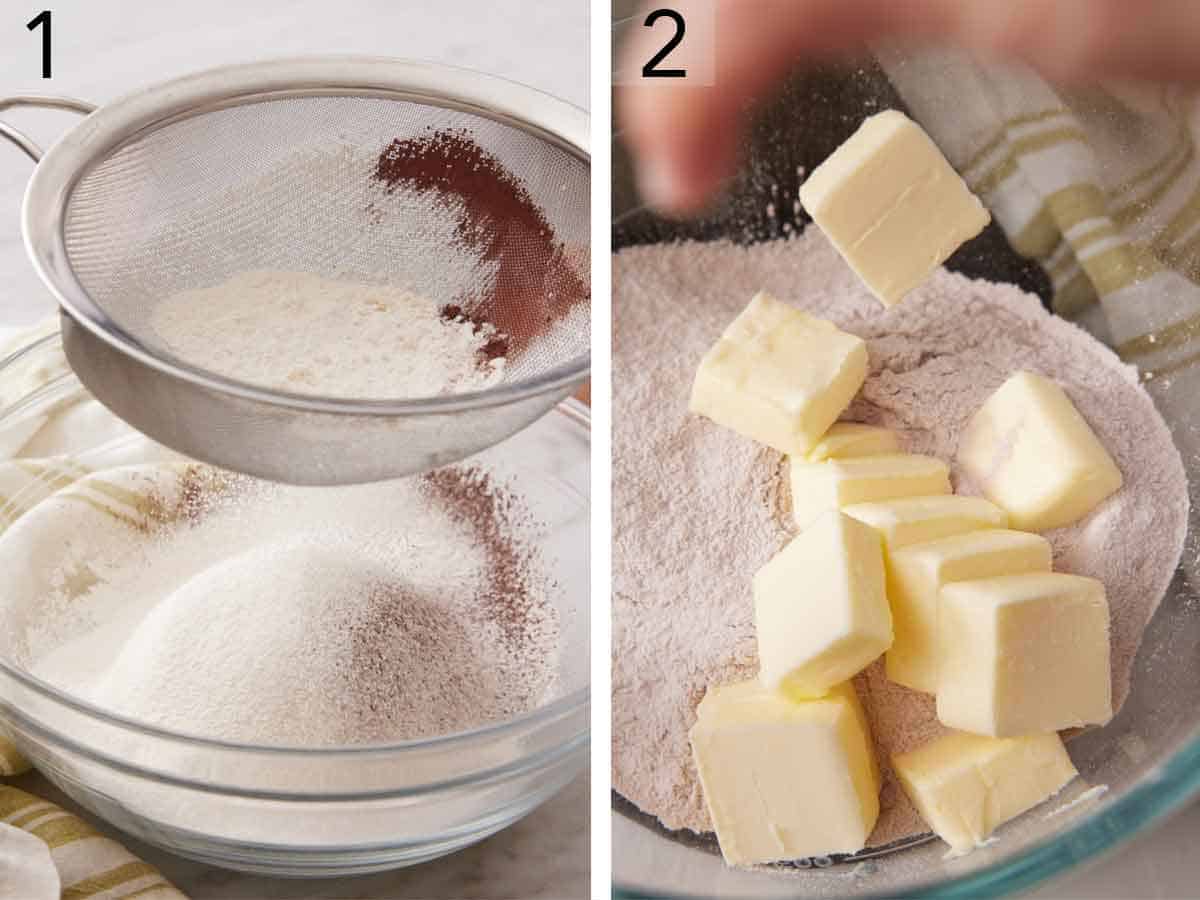
1. Preheat the oven to 350°F. Place 16 cupcake liners in cupcake pans. In a large bowl or the bowl of a stand mixer, sift the flour, sugar, cocoa powder, baking powder, and baking soda together. Add the salt and give it a whisk to combine.
2. Cut the room-temperature butter into tablespoon-sized pieces, then add to the flour mixture. Using a paddle attachment, mix on low until a sandy mixture forms.
3. In another bowl, combine the eggs, buttermilk, vanilla, and food coloring. Use 1 to 2 tablespoons of liquid food coloring or 5 to 6 drops of gel food coloring.
4. Whisk the wet ingredients together until a consistent color is achieved.
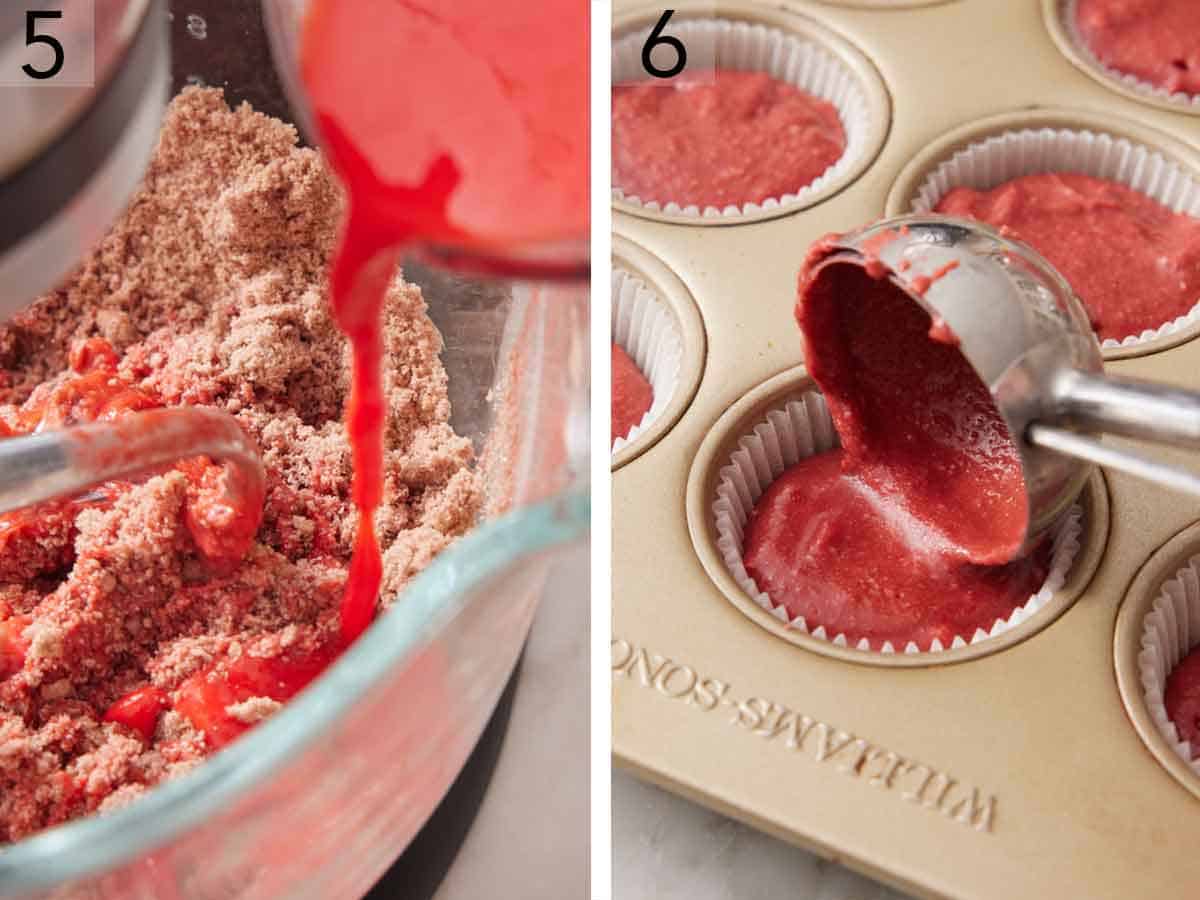
5. Slowly add the wet ingredients to the dry ingredients while mixing on low speed. Mix until combined, stopping to scrape down the sides of the bowl as needed.
6. Distribute the batter evenly into cupcake papers. Bake for 15 to 20 minutes or until springy to the touch. Let cool for a few minutes in the pans then remove and cool completely on a wire rack.
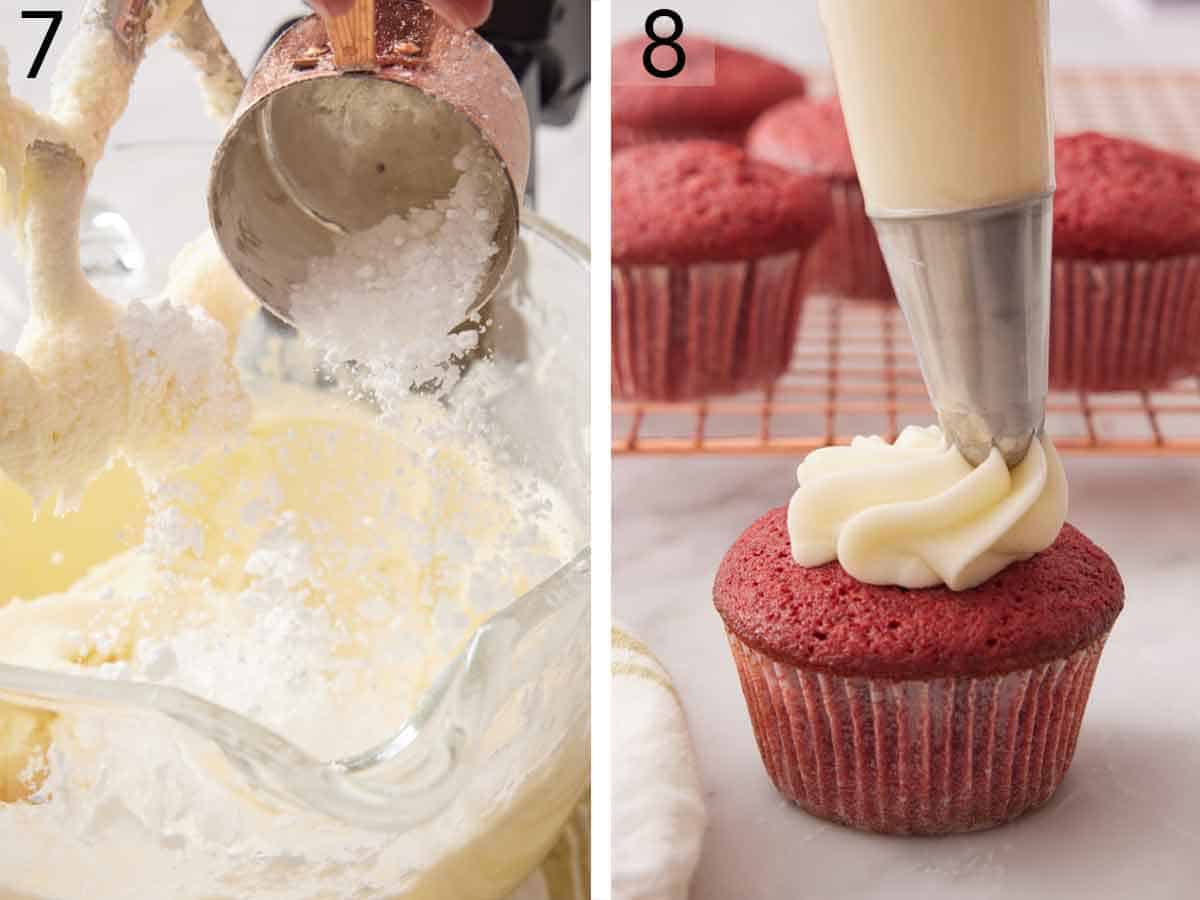
7. In a large mixing bowl or the bowl of a stand mixer fitted with the paddle attachment, cream the butter on medium speed until smooth and fluffy, about 2 minutes. Add the room-temperature cream cheese, vanilla, and salt to the creamed butter. Beat together on medium speed until well combined. Scrape down the bowl. With the mixer on low speed, add the sifted confectioners’ sugar a cup at a time. Mix until combined. If you want a stiffer buttercream, keep adding more sifted confectioners’ sugar until it’s the desired texture, or chill the frosting for a few minutes before piping.
8. Transfer the frosting to a piping bag fitted with a star tip and pipe large dollops on top of each cooled cupcake.
Chocolate cupcakes are the ultimate party food. These are super moist and bursting with rich, chocolaty flavor — and they’re so easy to make. Frost these delicious chocolate cupcakes with buttercream or cream cheese frosting, or try royal icing or even whipped cream.
Nutrition Facts (per serving)
158
Calories
4g
Fat
30g
Carbs
3g
Protein
Ingredients
1x2x4x
Original recipe (1X) yields 16 servings
1 ⅓ cups all-purpose flour
¾ cup unsweetened cocoa powder
2 teaspoons baking powder
¼ teaspoon baking soda
⅛ teaspoon salt
1 ½ cups white sugar
3 tablespoons butter, softened
2 large eggs
¾ teaspoon vanilla extract
1 cup milk
Directions
Preheat the oven to 350 degrees F (175 degrees C). Line a muffin pan with paper or foil liners.
Sift together flour, cocoa, baking powder, baking soda, and salt.Dotdash Meredith Food Studios
Cream together sugar and butter in a large bowl until light and fluffy.Dotdash Meredith Food Studios
Add eggs, one at a time, beating well after each addition. Stir in the vanilla. Add flour mixture in two batches, alternating with milk; beat well.Dotdash Meredith Food Studios
Spoon batter into the prepared muffin cups, filling each 3/4 full.Dotdash Meredith Food Studios
Bake in the preheated oven until a toothpick inserted into the centers comes out clean, 15 to 17 minutes. Remove from the oven and let cool before serving or frosting.
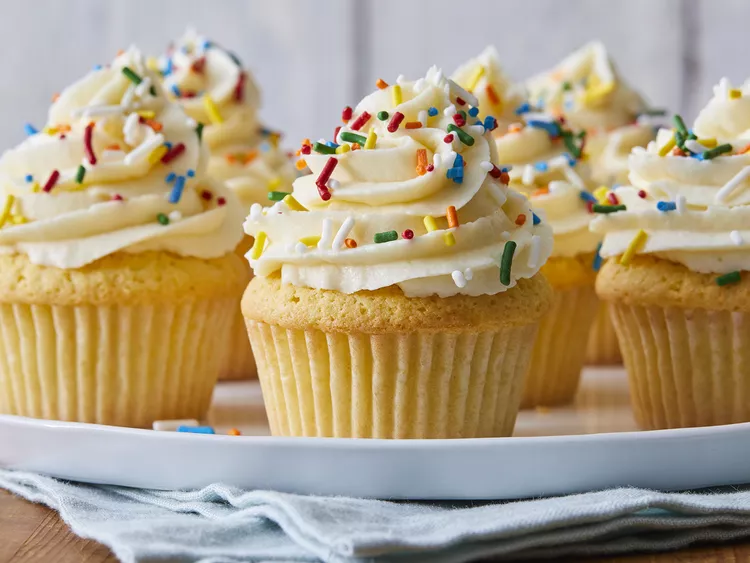
This easy vanilla cupcake recipe is made with simple ingredients. They are very tasty!
Nutrition Facts (per serving)
213
Calories
12g
Fat
24g
Carbs
3g
Protein
Ingredients
1x2x4x
Original recipe (1X) yields 12 servings
¾ cup superfine sugar
⅔ cup butter, softened
3 large eggs
1 ½ cups self-rising flour
1 teaspoon vanilla extract
Directions
Gather all ingredients. Preheat the oven to 350 degrees F (175 degrees C). Grease a 12-cup muffin tin or line cups with paper liners.Dotdash Meredith Food Studios
Beat sugar and butter together in a large bowl with an electric mixer until light and fluffy. Add eggs one at a time, beating well after each addition.Dotdash Meredith Food Studios
Beat in vanilla extract. Stir in flour just until mixed; spoon batter into the prepared muffin cups, filling each 3/4 full.Dotdash Meredith Food Studios
Bake in the preheated oven until the tops spring back when lightly pressed, 18 to 20 minutes. Cool in the tin briefly before transferring to a wire rack to cool completely.
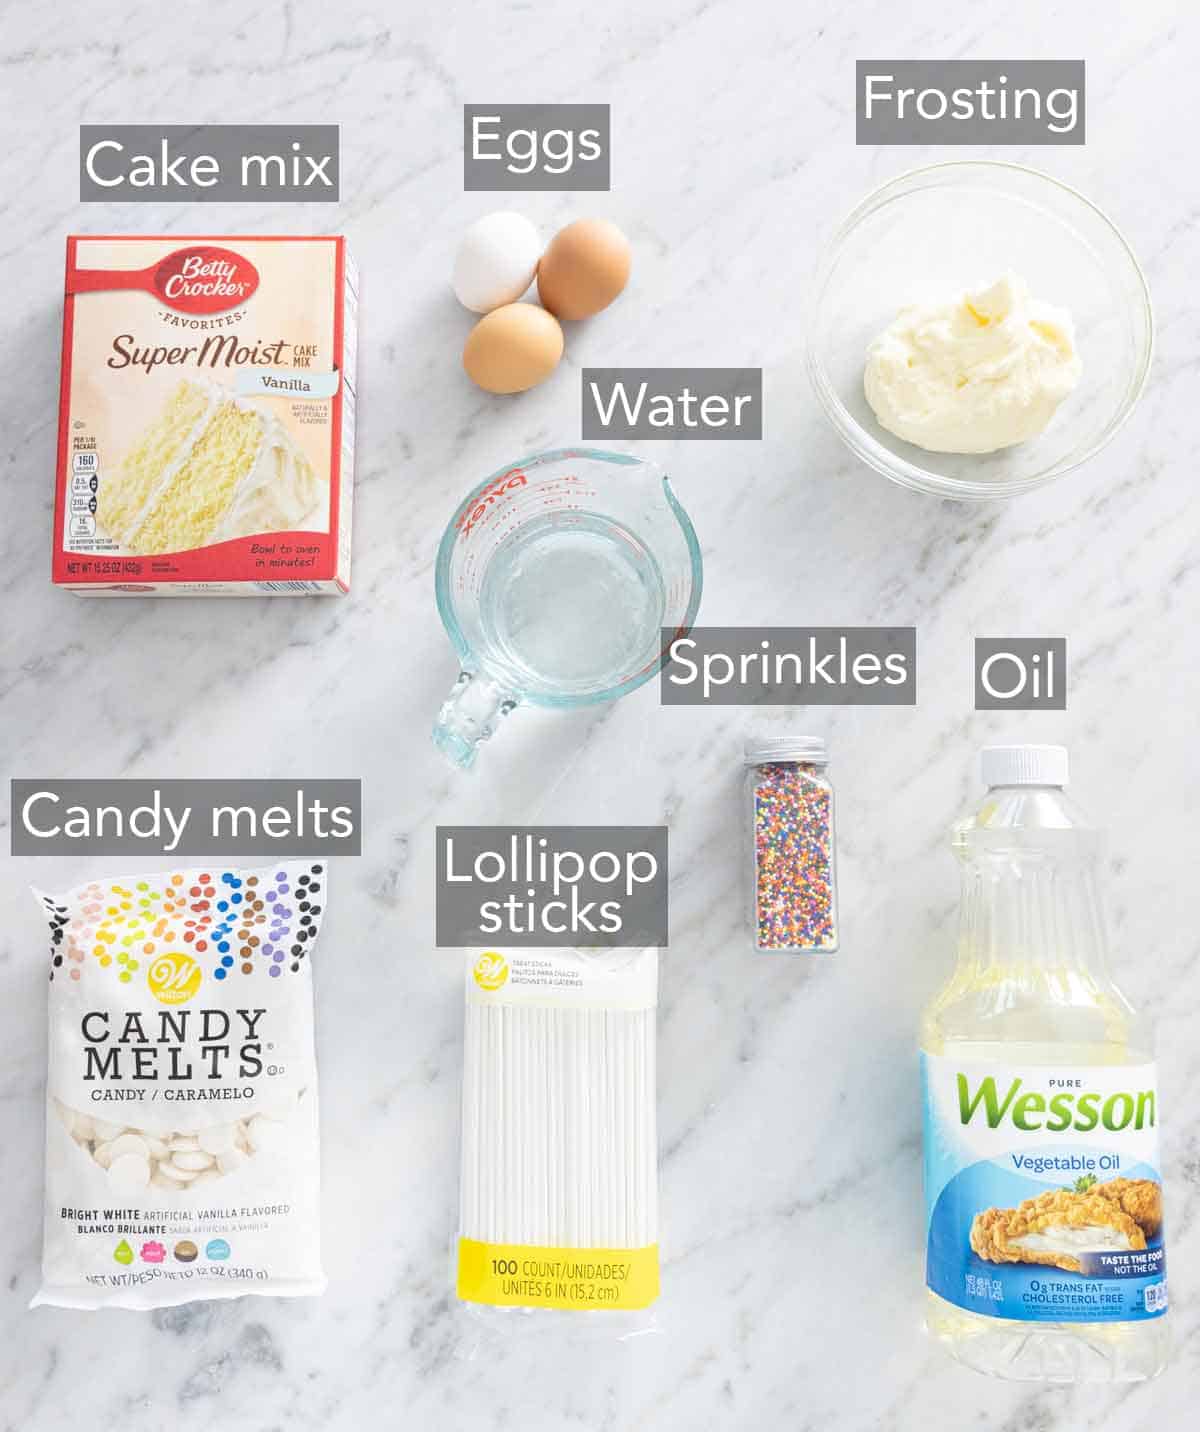
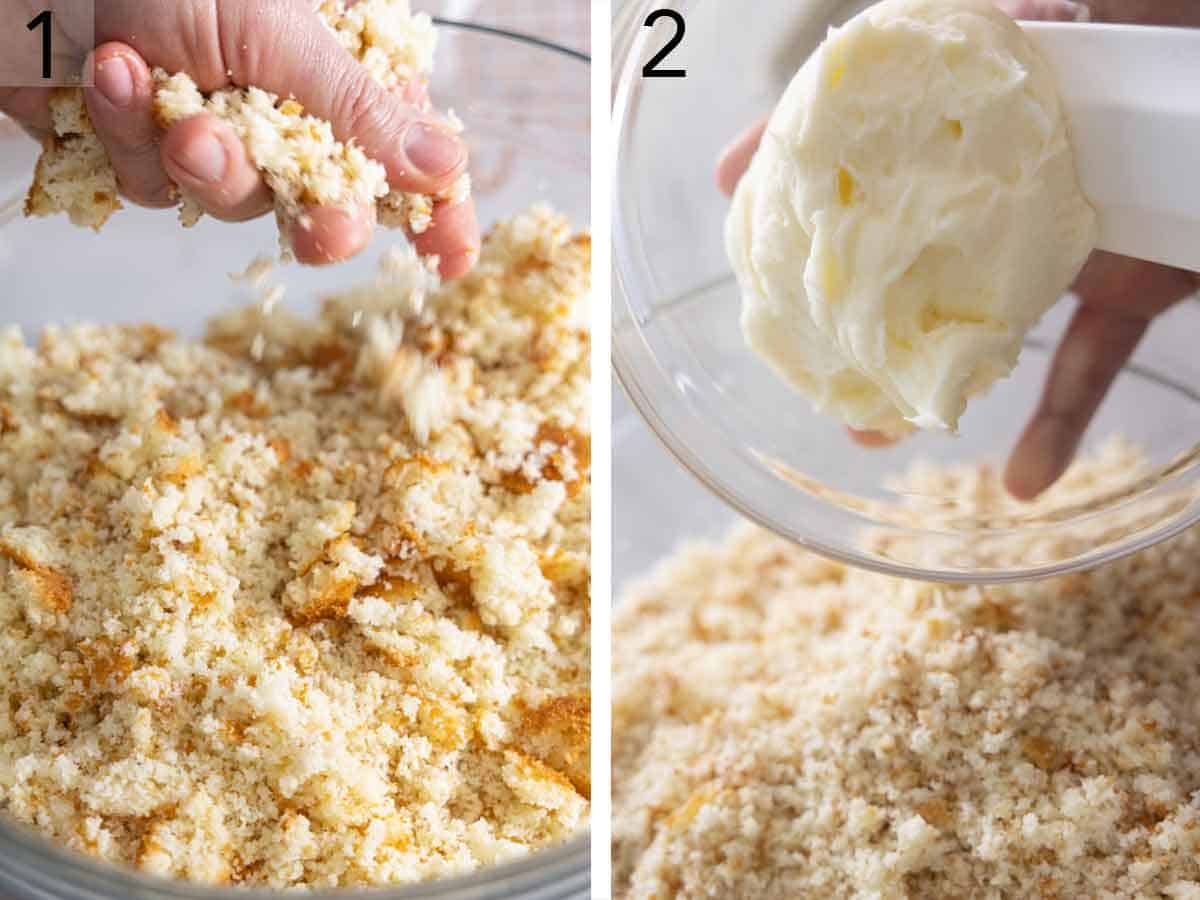
Vanilla cake — I use a box cake mix for these cake balls for convenience. However, if you have some leftover cake lying around, you can use that as well because nothing beats homemade cake. If you prefer you can use chocolate cake, red velvet cake, or strawberry cake instead.
Candy melts — once melted and dipped, candy melts will set up with the same look and texture as chocolate. It’s easier to use than chocolate, as you can skip tempering it. Careful not to scorch the melts, or they’ll harden too quickly to work with.
2. Add frosting and stir with a wooden spoon until the mixture resembles wet sand but is not smooth.
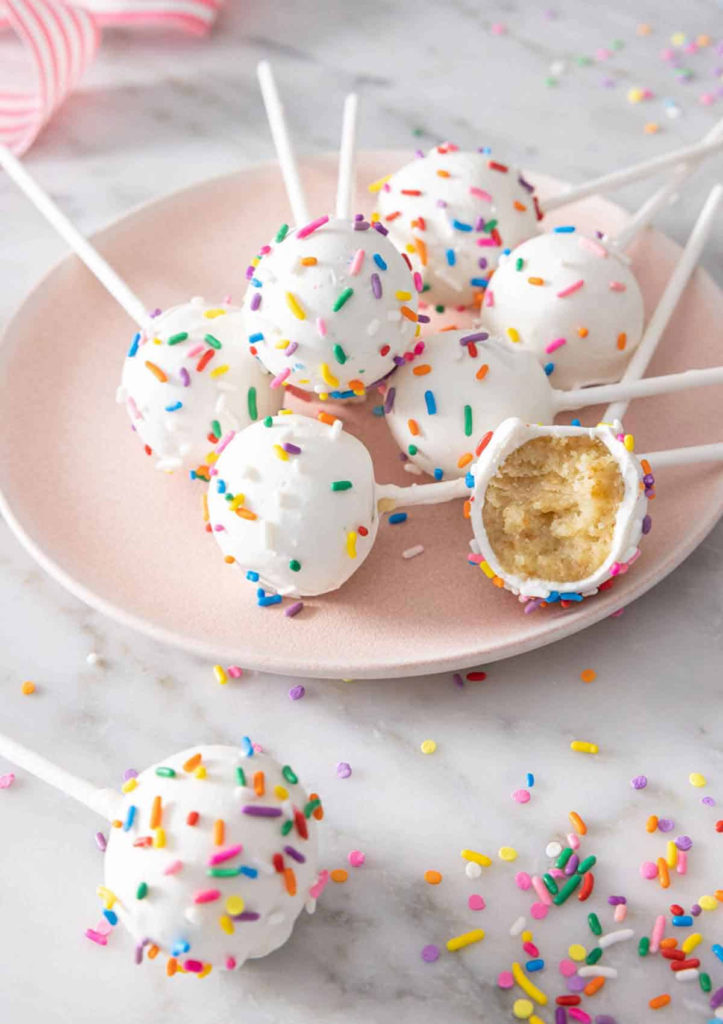
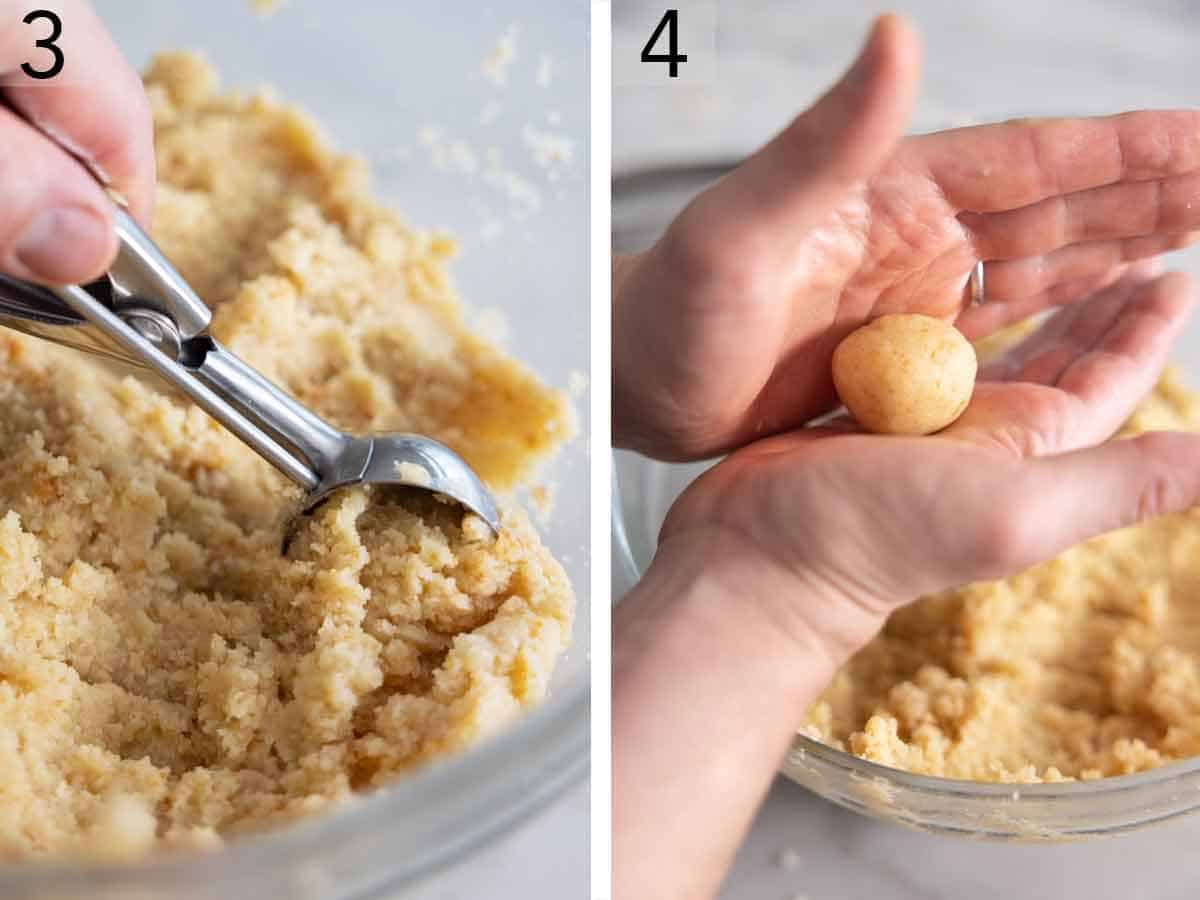
3. Use a cookie scoop to portion out the cake mixture.
4. Roll the mixture into 1-inch balls.
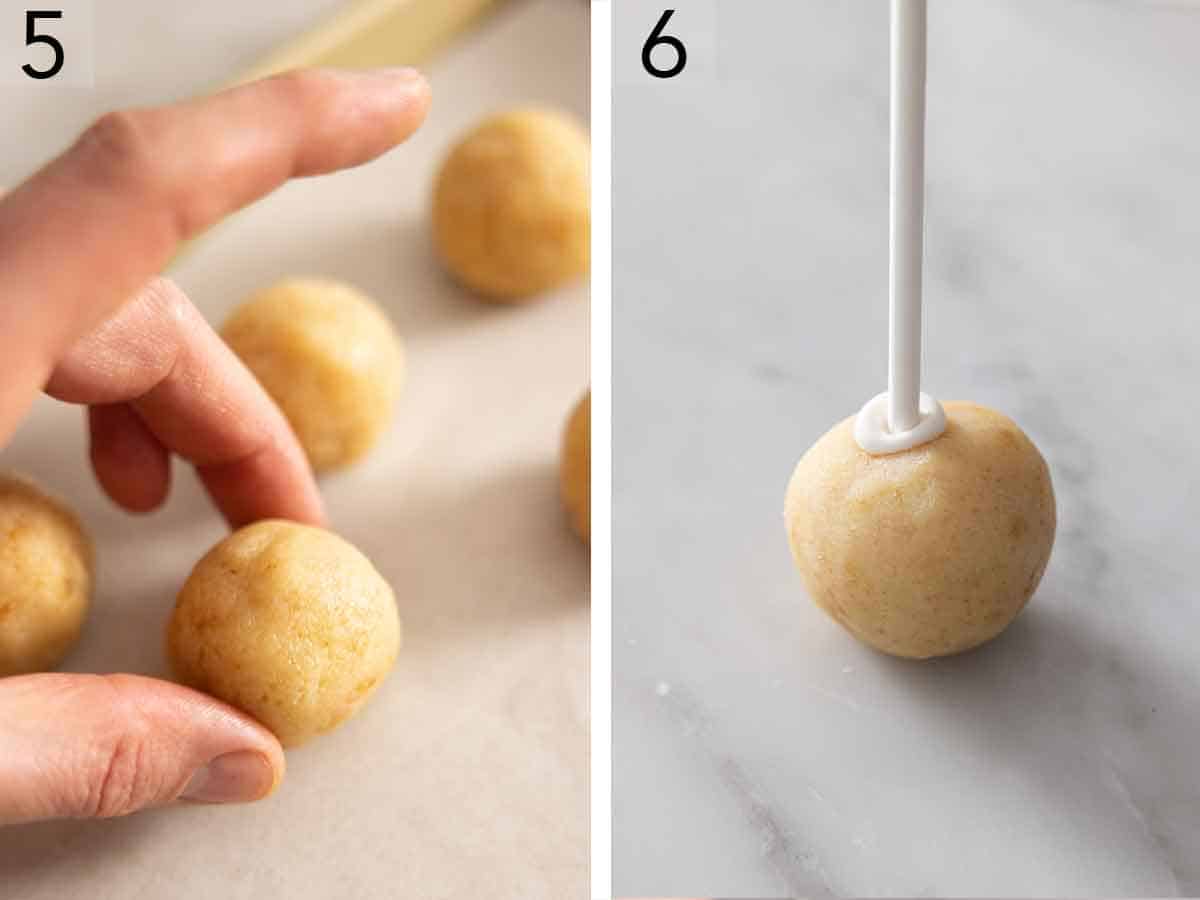
5. Place the rolled balls on a lined plate. Refrigerate for at least 4 hours or freeze for 30 minutes.
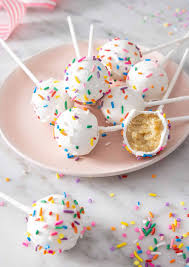
6. Melt candy or chocolate wafers according to the package instructions. Dip the tip of a lollipop stick in the melted chocolate and insert about halfway into a cake ball.
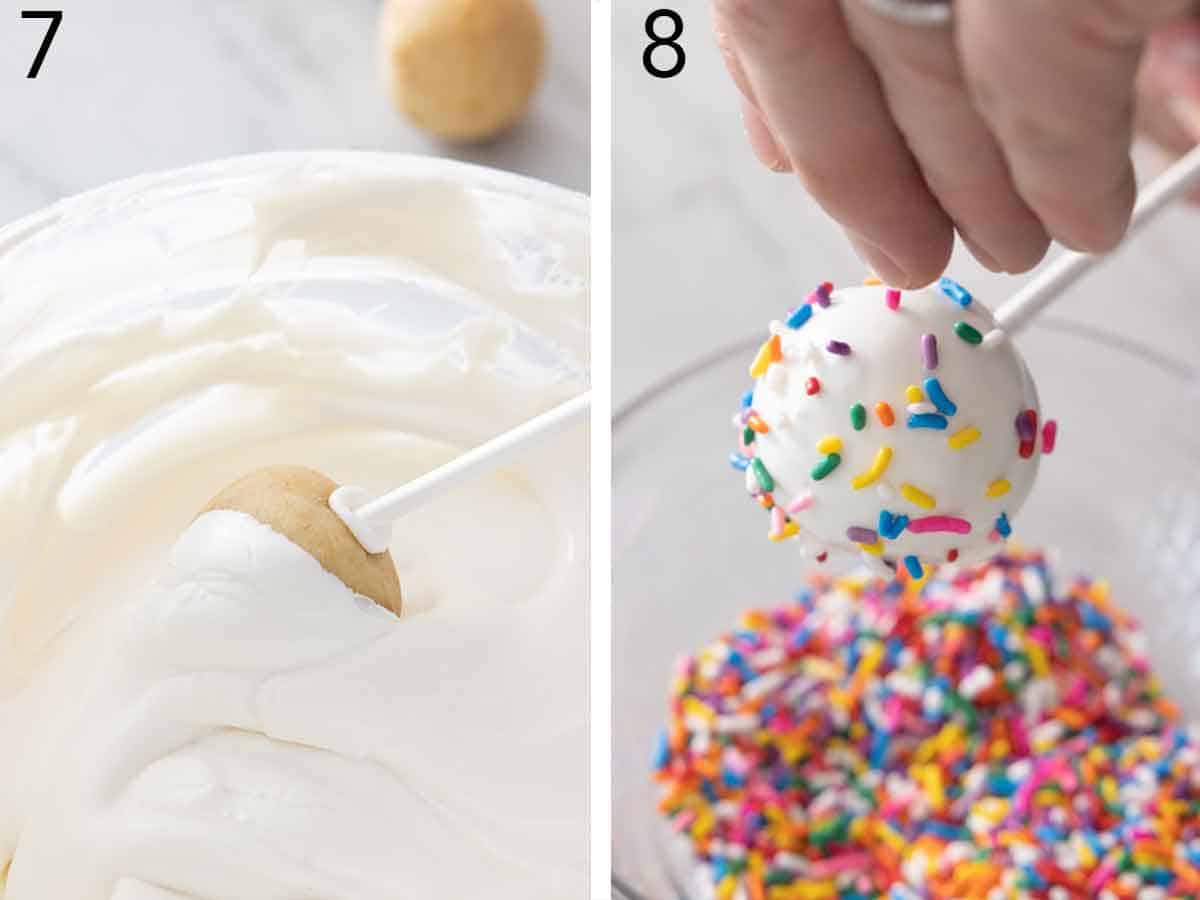
7. Dip the cake ball into the chocolate. Remove and gently tap on the side of the cup to let excess coating drip off.
8. Decorate with sprinkles if desired. Place upright and let stand until the coating is set.
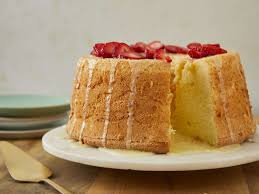
This chiffon cake is a favorite for children’s birthday parties. Serve with fruit or decorate with frosting.
Nutrition Facts (per serving)
264
Calories
10g
Fat
38g
Carbs
5g
Protein
Ingredients
1x2x4x
Original recipe (1X) yields 14 servings
2 cups sifted cake flour
1 ½ cups white sugar
1 tablespoon baking powder
1 teaspoon salt
7 large eggs, separated, divided
¾ cup cold water
½ cup vegetable oil
2 teaspoons vanilla extract
1 teaspoon lemon extract
½ teaspoon cream of tartar
Directions
Preheat the oven to 325 degrees F (165 degrees C). Wash a 10-inch angel food tube pan in hot soapy water to ensure it is grease-free; dry well.
Measure flour, sugar, baking powder, and salt into a sifter; sift into a bowl. Make a well; add egg yolks, water, oil, vanilla extract, and lemon extract to the well in the order listed. Do not beat.Dotdash Meredith Food Studios
Beat egg whites and cream of tartar in a separate, large bowl until very stiff.Dotdash Meredith Food Studios
Using the same beaters, beat egg yolk batter until smooth and light; pour slowly over egg whites. Gently fold mixtures together with a rubber spatula; do not stir. Pour batter into the angel food tube pan.Dotdash Meredith Food Studios
Bake cake in the preheated oven for 55 minutes. Increase heat to 350 degrees F (175 degrees C) and continue baking until a toothpick inserted into the center comes out clean, 10 to 15 more minutes.
Invert the pan onto a wire rack. Let cool completely before unmolding and frosting as desired.
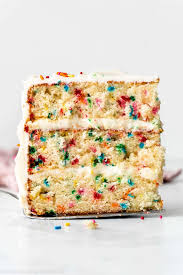
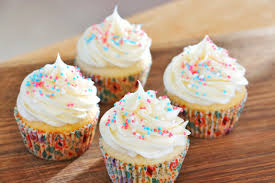
If you’re looking for a super soft cake that screams fun and flavor, this funfetti cake is it! This from-scratch funfetti cake recipe is a celebration in every bite, boasting a fluffy vanilla white cake with the most tender crumb, packed with a carnival of colorful sprinkles. It’s not just a cake – it’s a party for your taste buds!
How to Make Funfetti Cake
Funfetti Cake Layers
First we’re going to make the funfetti cake layers.
Begin by preheating your oven to 180 °C (350°F) and grease and line two 8-inch round cake pans. I use my homemade cake release to grease my tins, and I line the bottoms with parchment paper. If you’re using a fan function (convection mode) to bake your cakes, reduce the baking temperature to 160C (320F).
In a bowl, sift together flour, cornstarch, baking powder and salt. Using a whisk or fork, mix until well combined. Set aside.
Combine milk and vinegar in a small bowl. Vinegar is great for providing a tender crumb – check out this blog post for more information. Mix and set aside.
Next separate the yolks and whites from 6 large egg whites. This recipe only uses the egg whites. Don’t throw the egg yolks away 🙂 simply place them into an airtight container and pop them into the fridge to use for something else (like lemon curd or French buttercream). Set aside for now.
In another bowl, add in your butter, vegetable oil and sugar. Using an electric mixer (hand or stand mixer are both fine), cream together for 3 minutes until light and creamy.
Add in egg whites in 4 batches on a low speed, mixing well in between each addition (about 10-15 seconds between each batch).
Add in vanilla extract or essence, and half of the milk/vinegar mixture and mix until well combined. Now set your mixer aside as the remainder of the batter will be finished by hand.
Add in half of your premixed flour mixture to your wet mixture, and gently fold with a spatula until just combined. Then add in the remaining milk/vinegar mixture, and fold until just combined. Lastly, add in the remaining dry ingredients and gently fold until just combined. Do not overmix.
Finish off by folding in the sprinkles until just combined. Do not overmix.
Distribute the batter evenly into the two 8 inch cake tins, and bake for 30 minutes or until a toothpick comes out clean.
Once baked, allow the cake layers to cool in the cake tins for about 15-20 minutes, and then turn them out onto a wire rack to completely cool before frosting with the vanilla buttercream recipe below.
Vanilla Buttercream Frosting
This buttercream recipe is one of my favorite frosting recipes of all time! It’s so easy to make, not too sweet, and has the most gorgeous smooth texture.
In the bowl of a stand mixer (you can use a hand mixer too), add in the butter, powdered sugar, vanilla and cream.
Using the paddle attachment, mix on the lowest speed until the ingredients are combined (about a minute), and then mix on a medium-high speed for a full 10 minutes. Scrape the bowl down half way through. Once the frosting is light and fluffy, it’s ready to use. See note 6 if buttercream is curdling or very firm.
How to Decorate a Funfetti Cake
If your cakes have a dome on the top, begin by levelling the tops so that the layers are nice and flat.
Place your first cake layer onto your cake stand, and spread out a generous amount of the frosting on top. I like to use my offset spatula to do this.
Place the next cake layer on top and cover the top and sides with more frosting. If you have a cake scraper, you can use it to smooth out the sides. I like to do a little bit of piping on the top (I used a 1M piping tip for this cake), and piped little swirls on the top.
Finish by sprinkling some rainbow sprinkles onto each swirl, and then use the palm of your hands to gently press some of the sprinkles up against the side of the cake (see video for demonstration).

:max_bytes(150000):strip_icc():format(webp)/7307-Mini-Cheescakes-ddmfs-step-1-174-5dfe3937e06b47d9b08d867c9fbcb902.jpg) Dotdash Meredith Food Studios
Dotdash Meredith Food Studios:max_bytes(150000):strip_icc():format(webp)/7307-Mini-Cheescakes-ddmfs-step-3-176-c61f1c95c5494af3864c7ba00d6e06fa.jpg) Dotdash Meredith Food Studios
Dotdash Meredith Food Studios:max_bytes(150000):strip_icc():format(webp)/7307-Mini-Cheescakes-ddmfs-step-4-177-f68130de5a3a4cceafaebcb8fd2839a8.jpg) Dotdash Meredith Food Studios
Dotdash Meredith Food Studios:max_bytes(150000):strip_icc():format(webp)/7307-Mini-Cheescakes-ddmfs-step-6-230-b8771bd61b6543ba965e03f0d3874b08.jpg) Dotdash Meredith Food Studios
Dotdash Meredith Food Studios:max_bytes(150000):strip_icc():format(webp)/7307-Mini-Cheescakes-ddmfs-4x3-236-befa961645a0475a80b584d921d3c9fe.jpg)
:max_bytes(150000):strip_icc():format(webp)/5154425-lemon-cupcakes-AllrecipesPhoto-1x1-1-4f3ad60a12cb4528b08d8a9f91d0aaa4.jpg)


:max_bytes(150000):strip_icc():format(webp)/17377-chocolate-cupcakes-ddmfs-step-1-528-3x4-3bc2aebfe3754354ac4e4cc23f15718c.jpg) Dotdash Meredith Food Studios
Dotdash Meredith Food Studios:max_bytes(150000):strip_icc():format(webp)/17377-chocolate-cupcakes-ddmfs-step-2-530-3x4-bf7463912cb8421eb220fddcea4473a6.jpg) Dotdash Meredith Food Studios
Dotdash Meredith Food Studios:max_bytes(150000):strip_icc():format(webp)/17377-chocolate-cupcakes-ddmfs-step-4-536-3x4-47b07c1055b14b7691371964cd8abec6.jpg) Dotdash Meredith Food Studios
Dotdash Meredith Food Studios:max_bytes(150000):strip_icc():format(webp)/17377-chocolate-cupcakes-ddmfs-step-5-545-3x4-1a215b969ca2429b9f06f66bc1bb816a.jpg) Dotdash Meredith Food Studios
Dotdash Meredith Food Studios:max_bytes(150000):strip_icc():format(webp)/17377-chocolate-cupcakes-DDMFS-4x3-622a7a66fcd84692947794ed385dc991.jpg)
:max_bytes(150000):strip_icc():format(webp)/157877-vanilla-cupcakes-ddmfs-Step1-0382-61755a6e4165436881538f418c6d0331.jpg) Dotdash Meredith Food Studios
Dotdash Meredith Food Studios:max_bytes(150000):strip_icc():format(webp)/157877-vanilla-cupcakes-ddmfs-Step2-0383-8924198bdf2e4e19b57b9fa44f79aa3c.jpg) Dotdash Meredith Food Studios
Dotdash Meredith Food Studios:max_bytes(150000):strip_icc():format(webp)/157877-vanilla-cupcakes-ddmfs-Step3-0384-607d461caac447cf962c4309b5f3c512.jpg) Dotdash Meredith Food Studios
Dotdash Meredith Food Studios:max_bytes(150000):strip_icc():format(webp)/157877-vanilla-cupcakes-ddmfs-Step5-0390-0cf507ffd50a42ce84c2f3b993da613e.jpg)


:max_bytes(150000):strip_icc():format(webp)/7892-chiffon-cake-ddmfs-step1-0978-4x3-d2bea82d114542c985cd8c2aaec60309.jpg) Dotdash Meredith Food Studios
Dotdash Meredith Food Studios:max_bytes(150000):strip_icc():format(webp)/7892-chiffon-cake-ddmfs-step2-0979-4x3-a2e69d38ba1843bda3a7aacbae28b4da.jpg) Dotdash Meredith Food Studios
Dotdash Meredith Food Studios:max_bytes(150000):strip_icc():format(webp)/7892-chiffon-cake-ddmfs-step4-0983-4x3-7118f0160aea4ade8e4337fdad68b37e.jpg) Dotdash Meredith Food Studios
Dotdash Meredith Food Studios:max_bytes(150000):strip_icc():format(webp)/7892-chiffon-cake-ddmfs-11960-4x3-31cd0f36773640b193318e76a978cc0a.jpg)