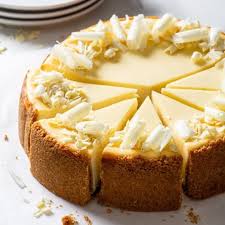
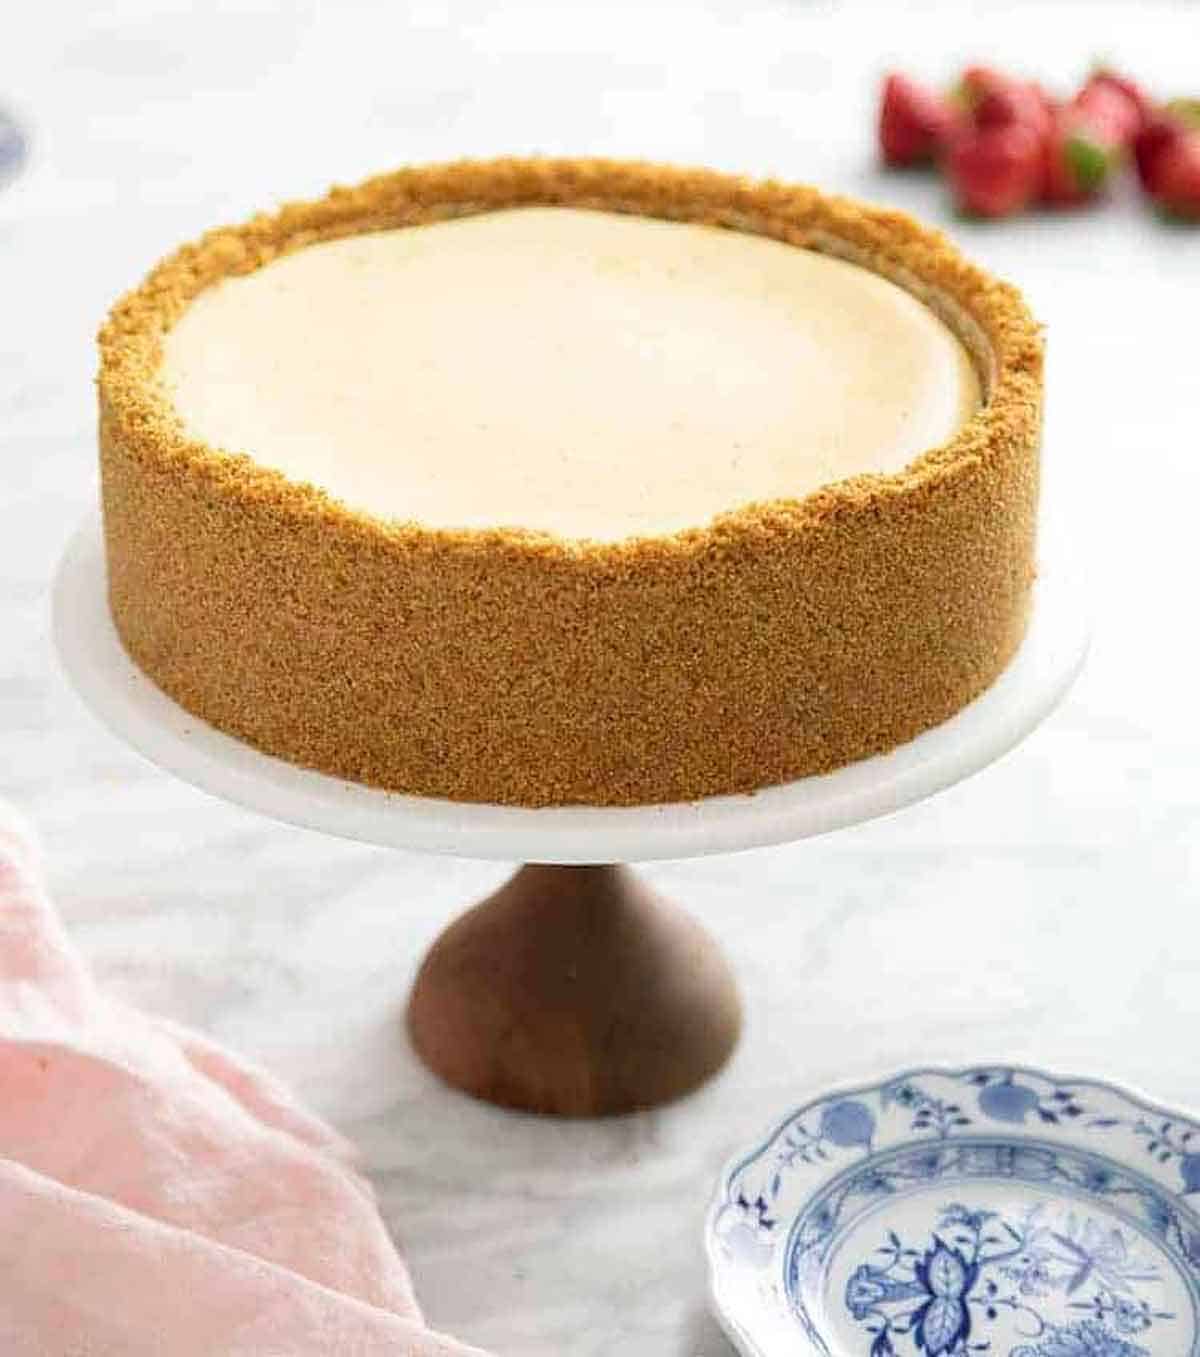
Creamy, smooth, and rich, this classic cheesecake recipe with a buttery graham cracker crust is simply decadent. My no-fuss recipe is a must-try— plus, there’s no water bath required for a crack-free cheesecake!
What You Need To Make This Recipe
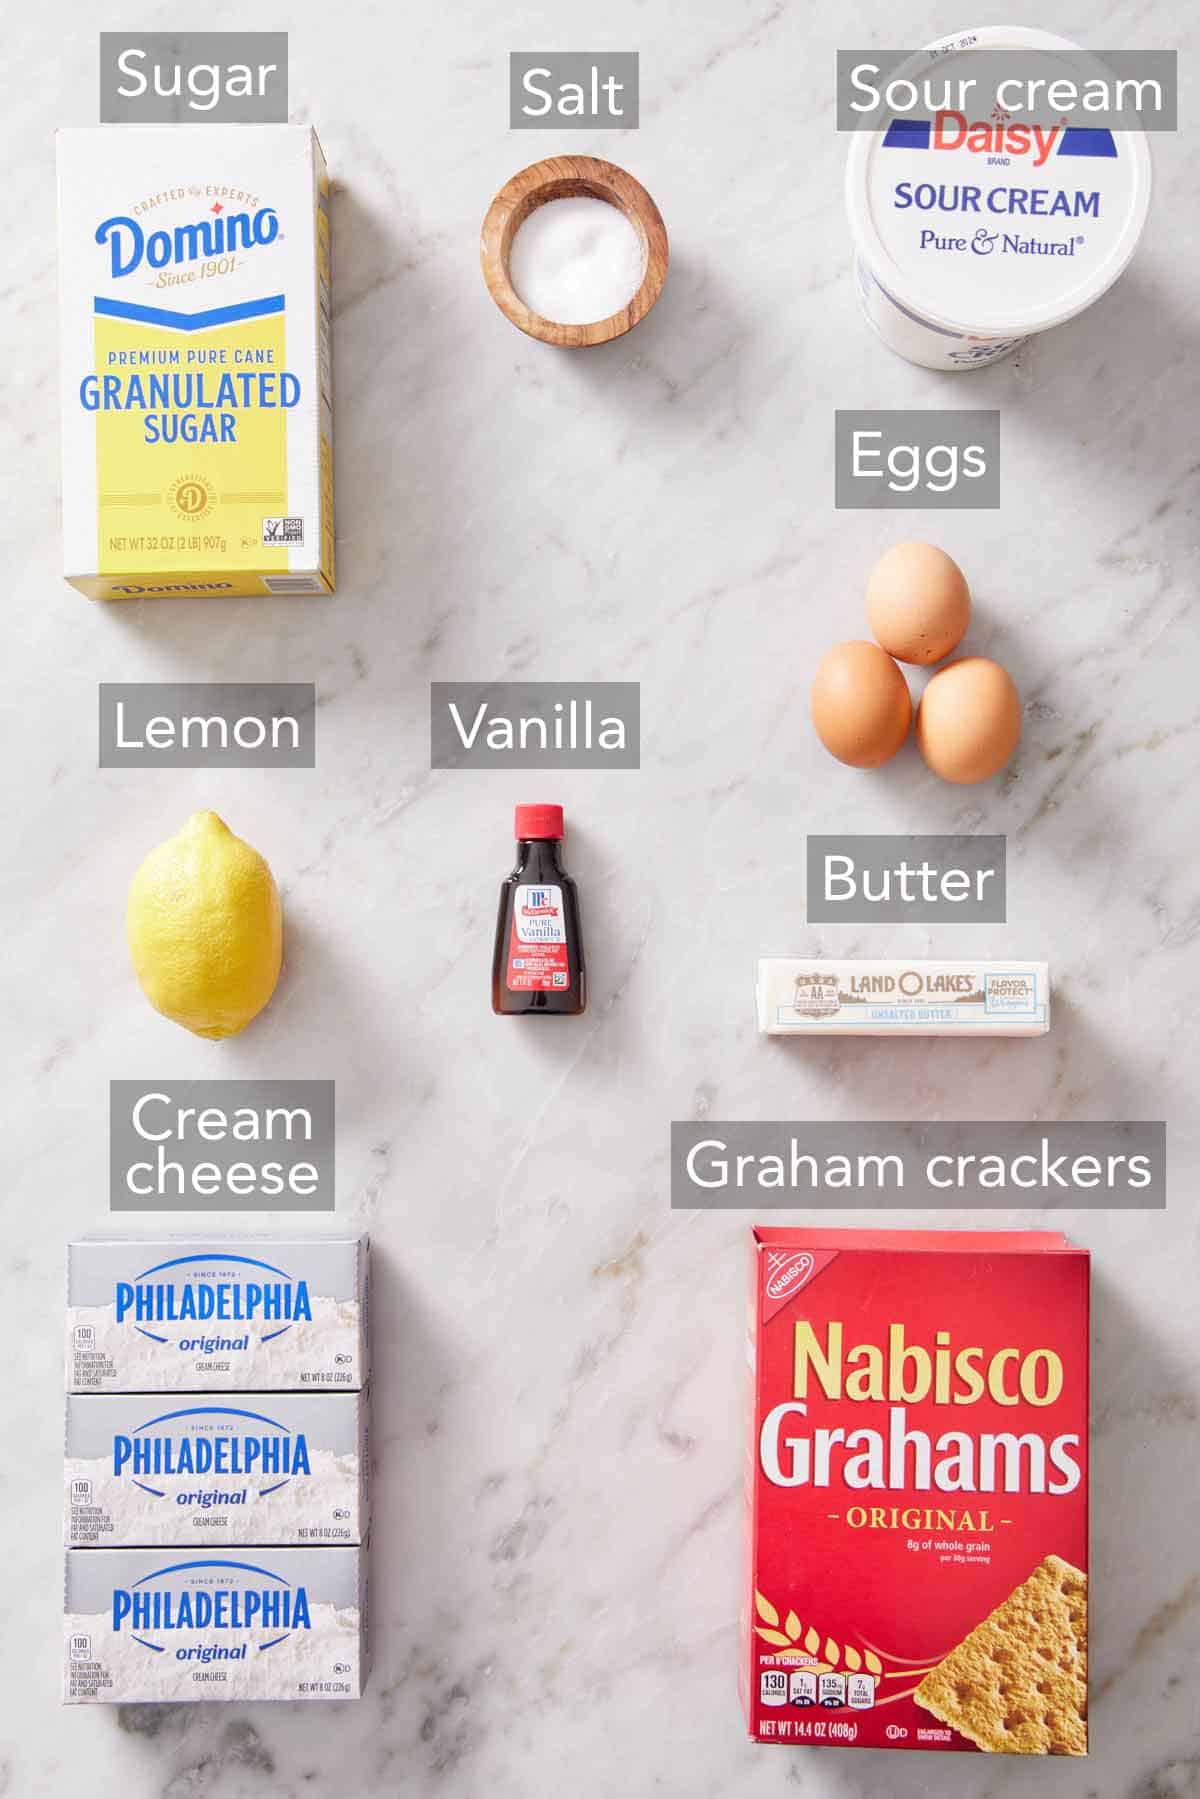
Graham cracker crust — for the buttery, crisp crust, you need graham cracker crumbs, melted butter, and sugar. You can buy premade crumbs in a box at the grocery store or blitz your own graham crackers in a food processor. Check out my graham cracker crust recipe for all the tips you need to know to make the perfect crust.
Cream cheese — blocks of plain, full-fat cream cheese is the best option. Low-fat cream cheese contains more water and can produce a cheesecake with an extra dense or grainy texture.
Granulated Sugar — you need 1 cup of white sugar to sweeten the cheesecake filling.
Vanilla — use high-quality vanilla extract, not vanilla essence. If you prefer a bakery-style look with little vanilla flecks in the batter, you can scrap the seeds from a vanilla bean or use vanilla bean paste.
Lemon juice — a little lemon juice cuts through the richness of the filling. This addition won’t taste like a lemon cheesecake, but it does enhance the flavor of the filling making it extra delicious!
Eggs — bring the eggs to room temperature before you start working on this recipe. If the eggs are cold, the cream cheese can firm back up when mixed with the eggs and form lumps in the batter.
Sour cream — use full-fat sour cream for the best results. Just like the eggs, let it come to room temperature for 30 minutes to 1 hour before you start the recipe.
What’s The Best Cream Cheese To Use?
For the best cheesecake ever, make sure you use the brick-style cream cheese, not the spreadable kind that comes in a carton. It should be plain and full-fat for the best flavor and perfect creamy texture. I prefer Philadelphia brand cream cheese. Other brands or generic store blocks can also work well, but the flavor and moisture content varies between each, so I always use Philadelphia to ensure consistent, delicious results.
Be sure to set it out for at least two hours before you start working on this recipe so the cream cheese has plenty of time to soften. This makes it easier to incorporate into a smooth, silky filling. Need to soften it faster? The warm bowl trick that I share for how to soften butter works really well here, too!
How To Make The Best Cheesecake
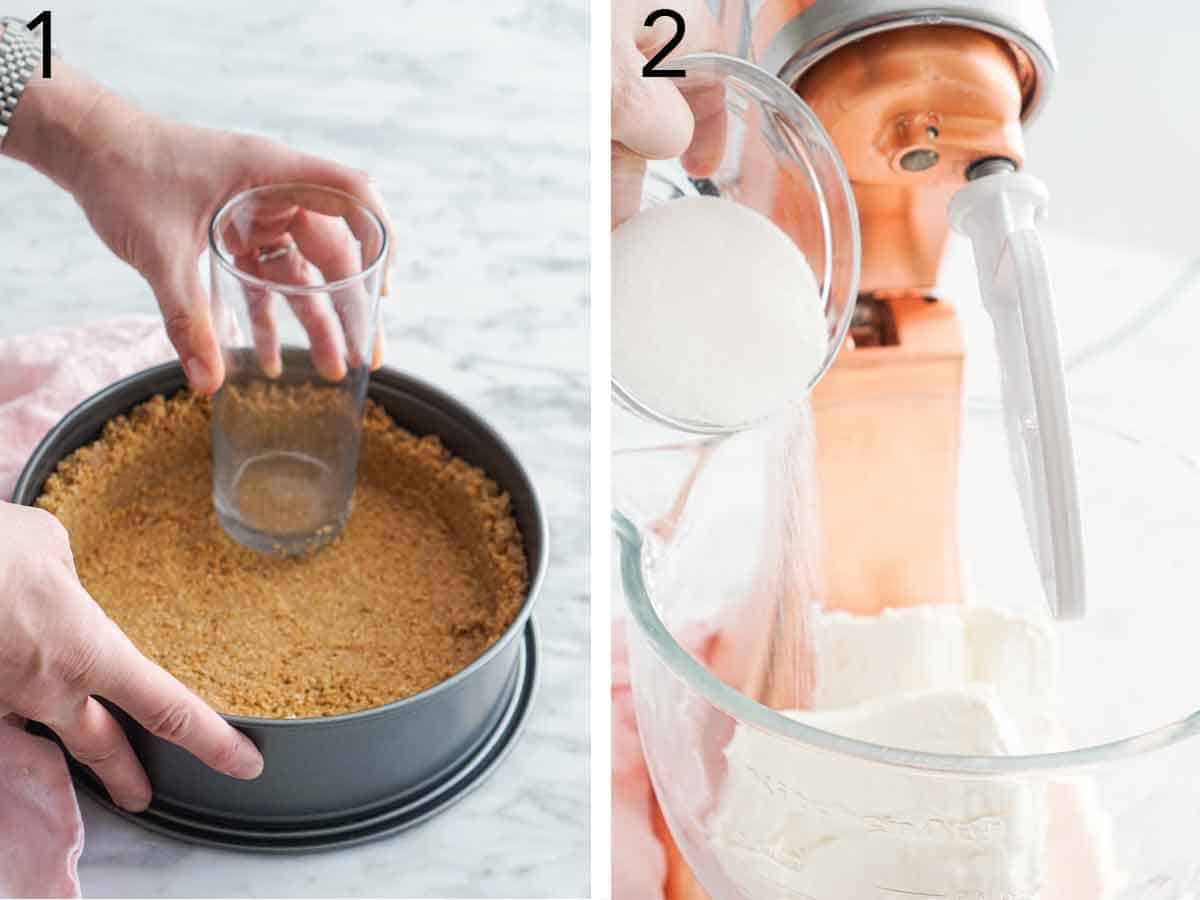
1. Make the buttery graham cracker crust in a medium bowl by combining the graham cracker crumbs, melted butter, and sugar. Stir together until the mixture feels like wet sand. Pour into a 9-inch springform pan. Press the crumbs into the bottom and slightly up the sides of the pan using the bottom of a glass or measuring cup. Place on a baking sheet and bake at 350°F for 10 minutes. Remove from the oven and let cool while making the cheesecake filling.
2. Place the cream cheese in a large bowl or the bowl of a stand mixer with the whip attachment. Beat on medium-low speed until creamy and smooth. Add the sugar, salt, vanilla extract, and lemon juice. Beat until the mixture is well combined and completely smooth. Stop and scrape down the sides of the bowl a few times during mixing to ensure everything is well incorporated.
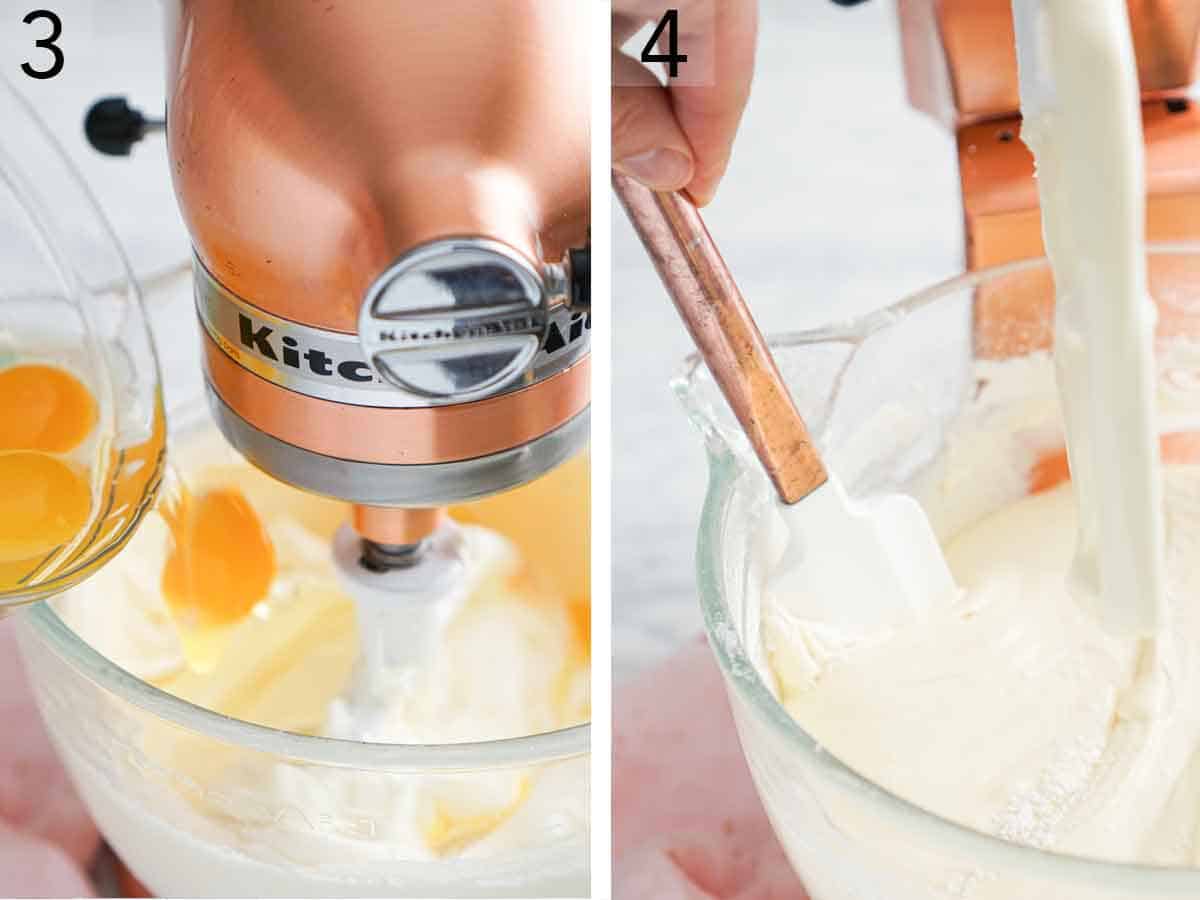
3. With the mixer on medium-low speed, add the eggs one at a time.
4. Stop and scrape down the bowl between additions.
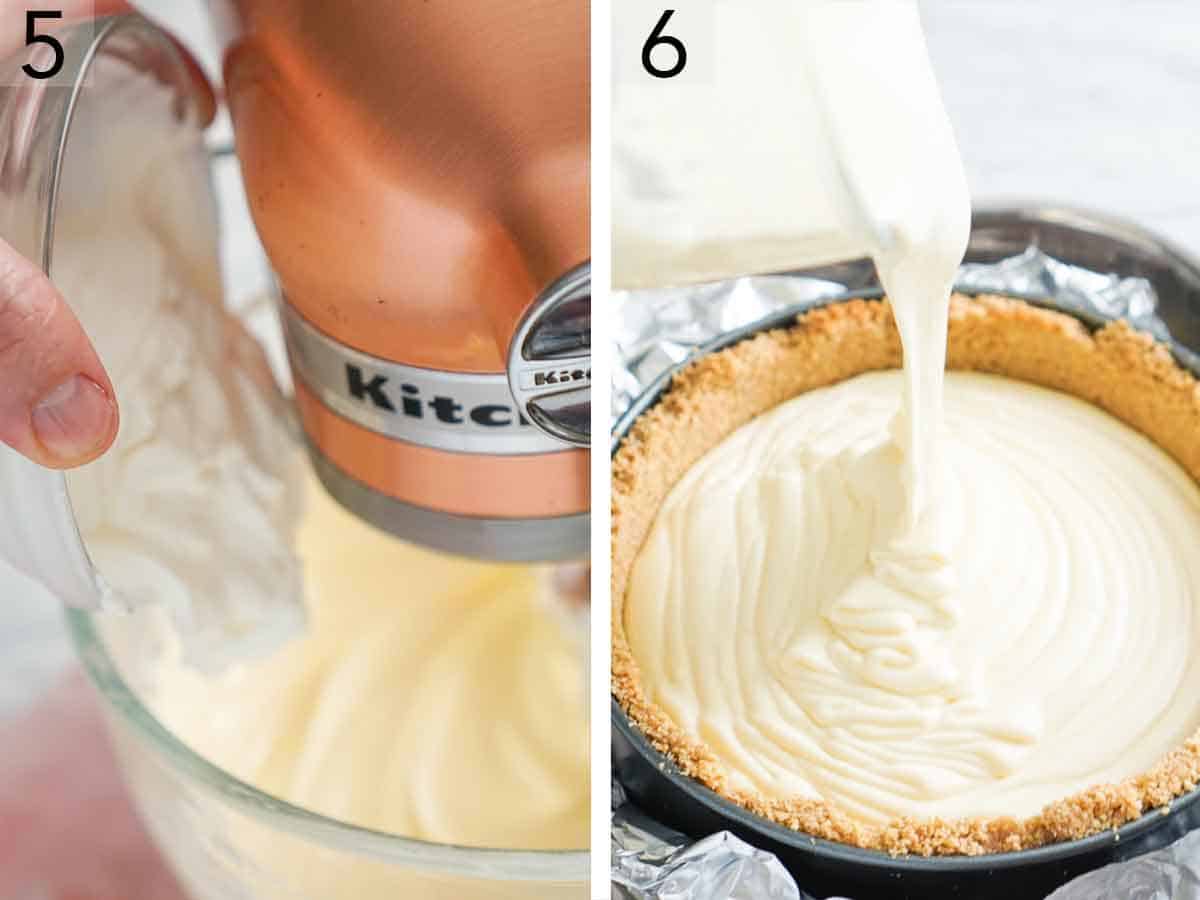
5. Once the eggs are well combined, mix in the sour cream until well incorporated.
6. Pour the batter into the cooled crust. Bake for 15 minutes, then reduce the oven temperature to 300°F and continue baking for another 30 to 35 minutes or until the edges of the filling are just slightly puffed and the center wobbles slightly when shaken gently. Turn off the oven and leave it in there with the door closed for 1 hour. Remove the cheesecake and let it cool at room temperature for another hour, then chill it in the refrigerator for at least 6 hours or up to 3 days before serving.
How To Prevent Your Cheesecake From Cracking
Follow these easy tips to bake up the perfect cheesecake:
- Use room temperature ingredients. Make sure to bring your cold ingredients (eggs, sour cream, and cream cheese) to room temperature so they will easily incorporate without overmixing.
- Don’t over-mix the batter. Over-mixing will incorporate too much air into the batter, leading to the cheesecake to puff up too much in the oven and then fall when it cools, giving you a cracked surface.
- Don’t open the oven! Do not open the oven to peek once the oven has been turned off to let the cheesecake cool. The hot air from the oven will escape, and cold air will enter the oven, causing the cheesecake to fall or crack. Abrupt temperature changes are a big reason cheesecake fillings crack, so avoid them as much as possible.
- Cool it slowly. Start by cooling the cheesecake in the oven and then at room temperature before eventually transferring it to the fridge to chill. The gradual cooling process prevents it from cracking.
Why You Don’t Need A Water Bath
Cheesecakes have a reputation for being fussy to bake, and one of the main reasons for this is the water bath. I specifically developed this recipe so that you can bake a cheesecake with a smooth, crack-free surface without a water bath! Here are my secrets to why you don’t have to use one for my recipe:
- Using the right number of eggs. The correct ratio of eggs to cream cheese is vital for a smooth surface and a filling that is dense but still fluffy. Too many eggs will cause the filling to puff up too much, then collapse and crack when it cools. Too few, and the cheesecake will be too dense and crack when it cools. Generally, you want to use 1 large egg per 1 (8-ounce) block of cream cheese.
- Baking slowly at a lower temperature. This allows the filling to set slowly, resulting in the ideal crack-free surface because the filling cooks more evenly. Although the filling will puff some, it doesn’t dramatically puff on the edges and overbake before the center is done.
- Don’t trust your oven? If you’re concerned that your oven may run or cycle hotter than the intended bake temperature, you can put a casserole dish of hot water on the bottom oven rack with your cheesecake on the rack above it. This will add extra moisture to the oven without placing your pan in the water and risking water seeping into your cheesecake crust.
Why You Do Need A Springform Pan
A springform pan is a must for a baked cheesecake because it makes serving so easy. Since you can’t invert a cheesecake from a cake pan to remove it like you can, for example, a classic vanilla cake, a springform pan allows you to simply remove the sides of the pan and slide the cheesecake onto a serving dish.
In a pinch, you could bake this in a 10-inch pie dish and simply serve it out of the dish. The overall baking time might be 10 to 15 minutes less since the cheesecake will be a bit thinner.
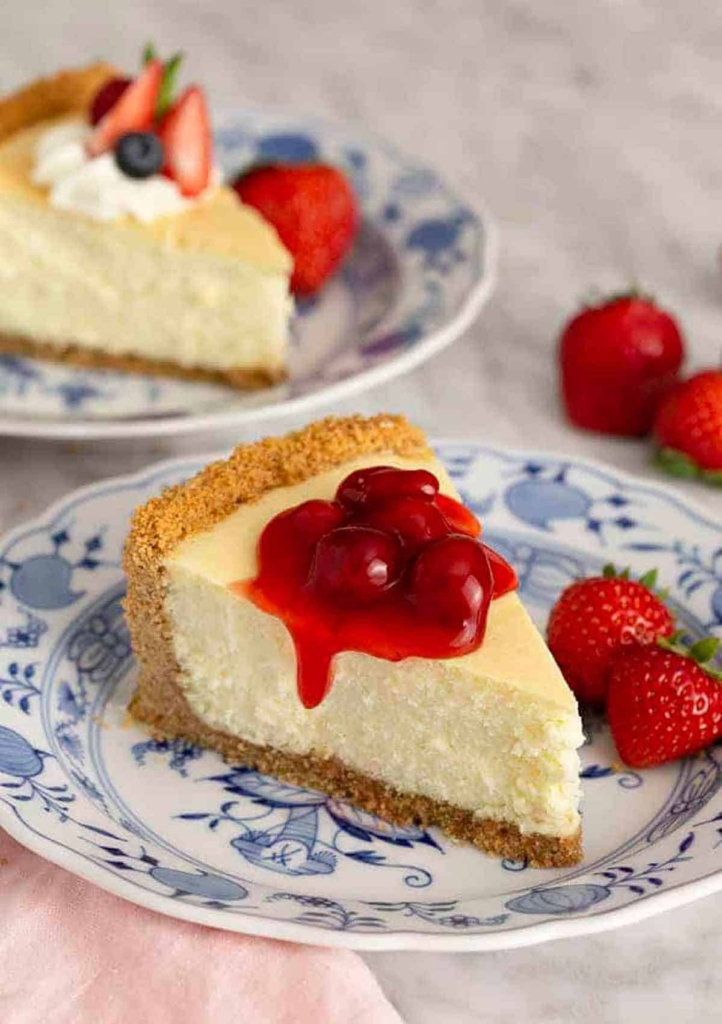
Topping and Serving ideas
This cheesecake recipe is the perfect palette for your favorite toppings. Here are some of my favorites to serve over a cheesecake slice:
- Cherry pie filling
- Lemon curd
- Chocolate ganache
- Caramel sauce
- Homemade whipped cream
- Fresh fruit
- Fruit sauces like strawberry or raspberry sauce. Try my strawberry cheesecake for a chunky, glossy strawberry sauce topping.
How to Store
Make-ahead: Since cheesecake keeps well in the refrigerator for up to 4 days, feel free to make it a night or two in advance. This is actually the perfect way to ensure it has plenty of time to chill in the refrigerator. I like to keep it in the springform pan, lay a thin tea towel or paper towel on the top edge of the pan, and then wrap it with foil or plastic wrap. The towel will absorb any moisture and keep it from dripping onto the cheesecake filling. Remove it from the pan when you are ready to serve.
Leftovers: Store the cheesecake in an airtight container and refrigerate for up to 4 days.
Leave a Reply